with articles on computer applications in photography.
|
The Magic Hours Golden Hour and Blue Hour Shooting and Postprocessing |
|
|
Back to the Photo Bytes section, with articles on computer applications in photography. |
|
While this article is (mostly) done, this is an early version; I expect it to grow and evolve in the coming weeks and months, until it reaches full perfection. (Just kidding, but it sounded good, so I thought it may be worth a try!)
Any substantial changes or additions after June 5 will be clearly marked here.
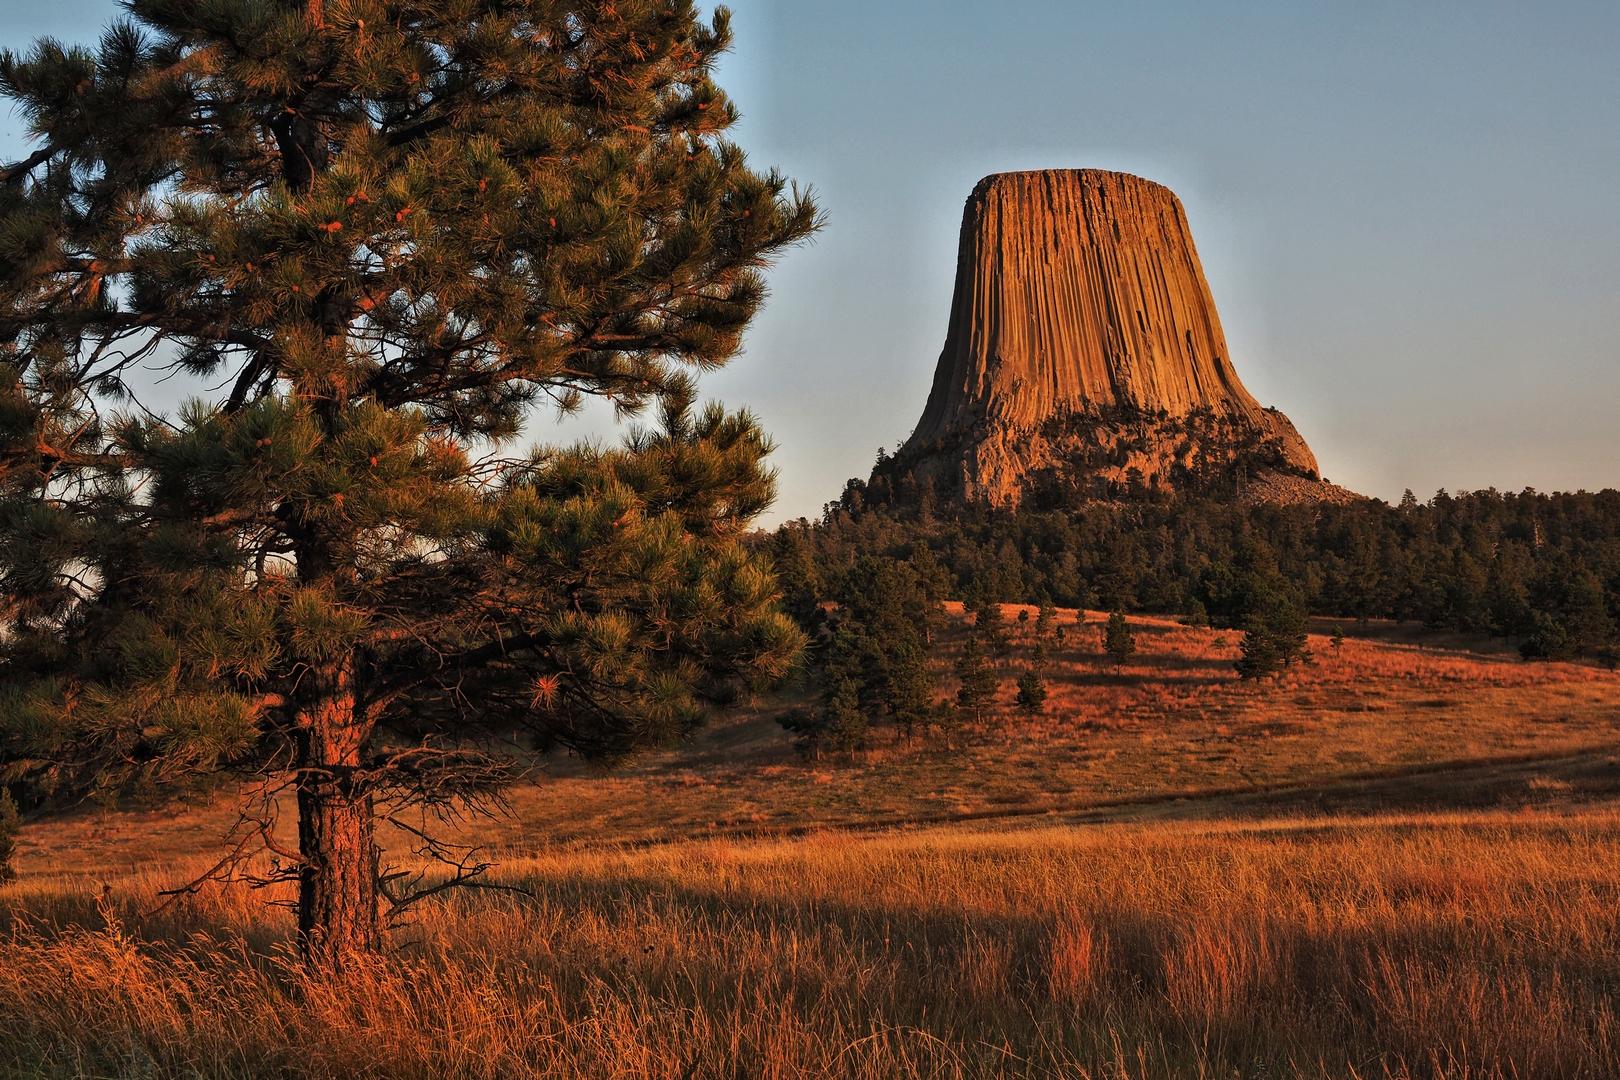
Golden Hour and Blue Hour are the terms assigned to the time periods over any given day, when the Sun is just above (golden) or just below (blue) the horizon. Many photographers find the quality of light during those periods very attractive; hard or impossible to recreate under different conditions. |
Olympus E-30, ZD 12-60/2.8-4.0 at 30 mm |
Olympus E-300, Sigma 55-200/4.0-5.6 at 200 mm |
|
Some hairsplitting Obviously, there are two of each every day. Their exact lengths depend on the time of the year. observer's latitude, but also on the definition of "just above" and "just below" terms we are using here. The elevation values of +6° (golden) and -6° (blue) are often used. These make sense, although I would opt for more. (Note: elevation angles are measured perpendicular to the local horizon plane. not along the Sun's apparent path.) This would, however, make things too simple. Some writers argue that the quality of light over the first few degrees of the Sun below the horizon is quite like that within the first few above, so that the borderline between gold and blue should be moved down. For example, blue would be (-6°to -4°) and golden — (-4°to +6°) Frankly speaking, I don't care. It is just a matter of agreeing what words mean, or how to draw a line — like with "middle class". How is the light different, and why? The image recorded as a photograph (disregarding artificial light sources) captures the sunlight reflected (or, more exactly, scattered) from the subject. Assuming no clouds, this light consists of two major components.
The direct sunlight has, before illuminating the subject, to pass through the air of the Earth's atmosphere, and lots of it. For the Sun directly overhead (which may happen only in the tropics) the thickness of this layer, measured at the sea level, is about 1000 g/cm2 — that's as much as in a 10-meter layer of water! This dramatically increases as the Sun gets lower in the sky: 2000 g/cm2 at the elevation of 30° and close to 10,000 g/cm2 at 6° the commonly assumed golden hour limit.
| Why does this matter? It does, because this is what makes the sunlight progressively more red as the Sun gets closer to the horizon. The light of the Sun has a continuous (as opposed to discrete) spectrum, which means that it is a mix of all wavelengths in the visible range and beyond (ultraviolet, infrared). Some of that light passes through the air intact, while some gets scattered (randomly deflected, possibly multiple times), thus being removed from the direct sunlight. The shorter the wavelength, the more scattering: more of the blue component gets removed from the direct sunlight, while more of the red stays. The Sun, and the objects lit by it, become progressively red.
| 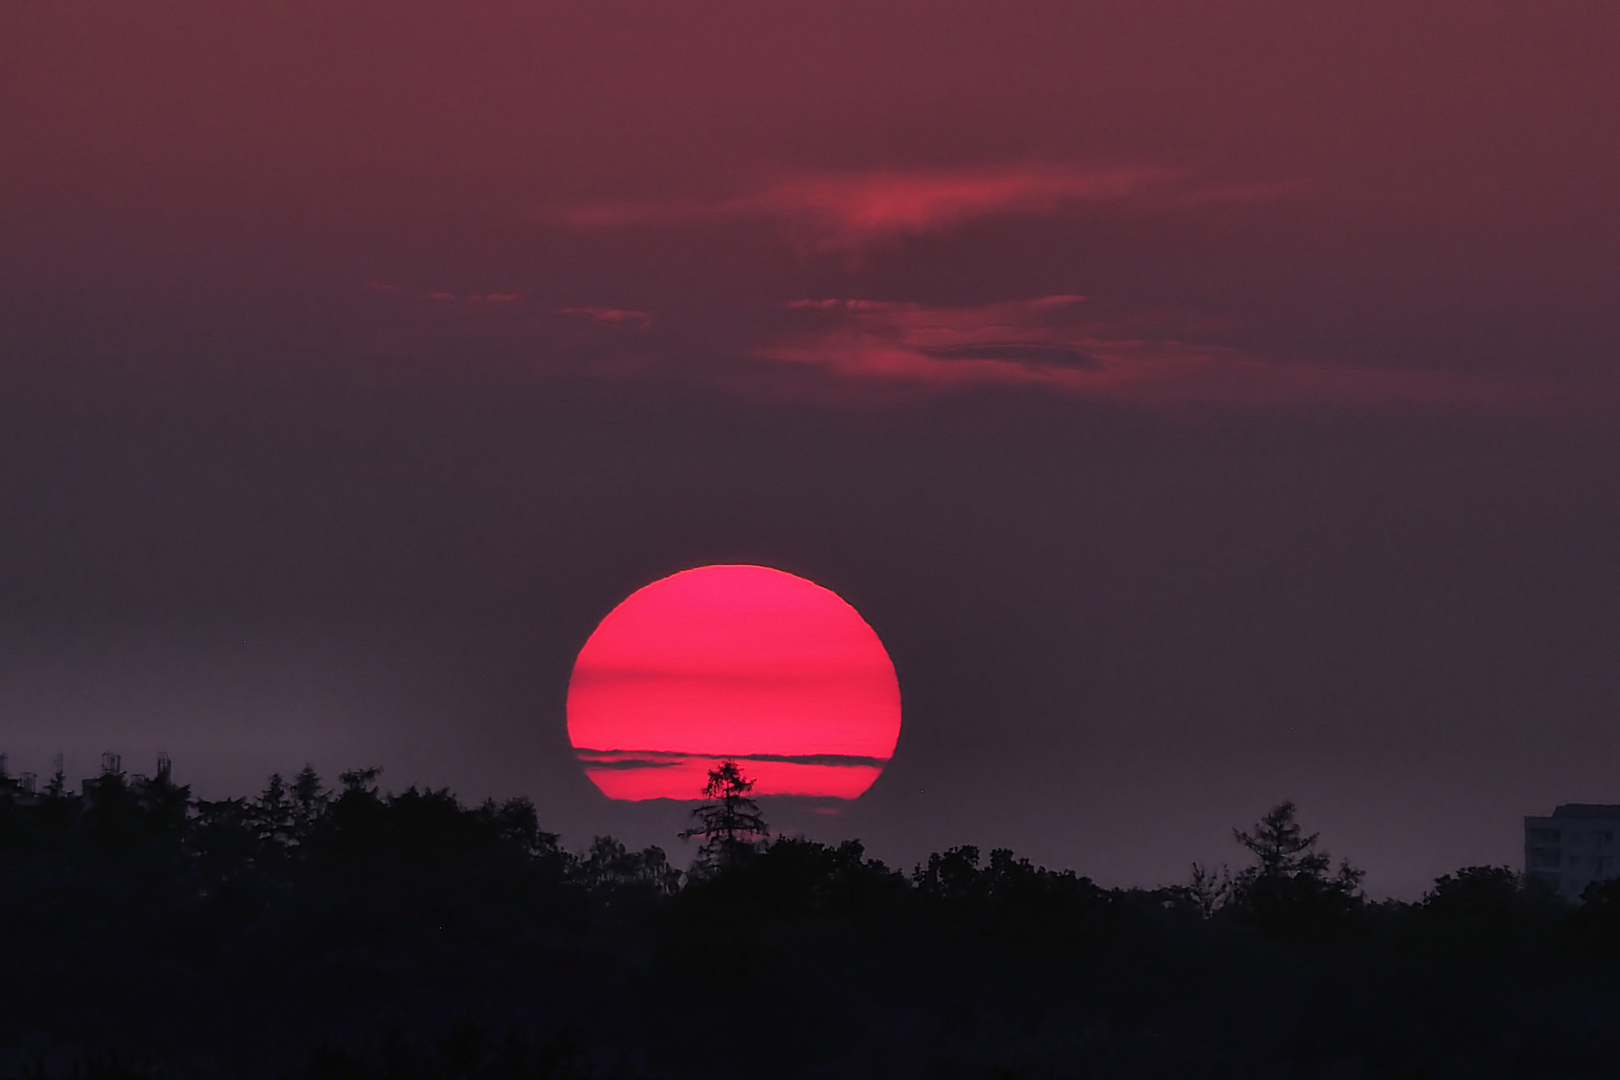
Olympus E-M1 Mk.II, MZD 75-300/4.8-6.7 at 300 mm, cropped
|
This is a quite well-known fact, but it is only one side of the story. The other one is what happens with the scattered shorter wavelengths, the blue end of the spectrum. After multiple deflections some of it escapes into the outer space, making our planet so nicely blue to an outside observer; some reaches the Earth surface, making our sky look blue, and providing a diffused, bluish light.
This light is usually weaker than the direct sunlight, so the effect is usually hidden, except for the "open shade" lighting (note: the highest, or most blue, color temperature of all WB presets, 7500°K compared to 5300°K for "sunny"). What really happens during the Golden and Blue Hour? And with the Sun near the horizon, it is when the fun really begins. In addition to becoming more red, the direct sunlight gets weaker, while the blue ambient light becomes more saturated. Many scenes (see my urban landscape below) become more colorful, with different areas, depending on the angle, illuminated mostly by one or the other component. The ambient light, no longer relegated to a second-class status, also opens up the shadows. My description follows the sunset Golden and Blue Hours. For the sunrise ones all happens in reverse order. But wait, we haven't even entered the Blue Hour yet. Once the Sun gets below the horizon, the direct component does not go away. If we have some clouds in the Western sky, still lit by the Sun, they will take over the job of providing the non-scattered (red) component, even if it will be softer, more diffused than when coming directly from the Sun. It will also become more purple than red, because of both components more evenly mixed (and red+blue=purple). It is this time of transition which I consider best for picture-taking (usually delivering most enjoyable, sometimes unexpected, results), and I think inserting a Golden/Blue boundary point into it is simply misleading. The Blue Hour then becomes purely blue, losing most of other hues, to the point of becoming monochrome, but retaining the softness. this still may work nicely with some subjects, until we simply reach the point when there is not enough light. Artificial light This may be another kind of light in our scenes, in addition to the two already discussed. With the right timing, it may become quite a factor — see the Urban Landscape example below. You may have to wait until the two other kinds become weaker, for this one to come out. Golden Hour Landscapes Wide-open landscapes in Golden Hour light from behind the camera (usually a poor lighting, but not here) are easy and predictable to shoot, and still can be quite pleasing. | ||
Olympus OM-D E-M1, MZD 12-40/2.8 at 21 mm |
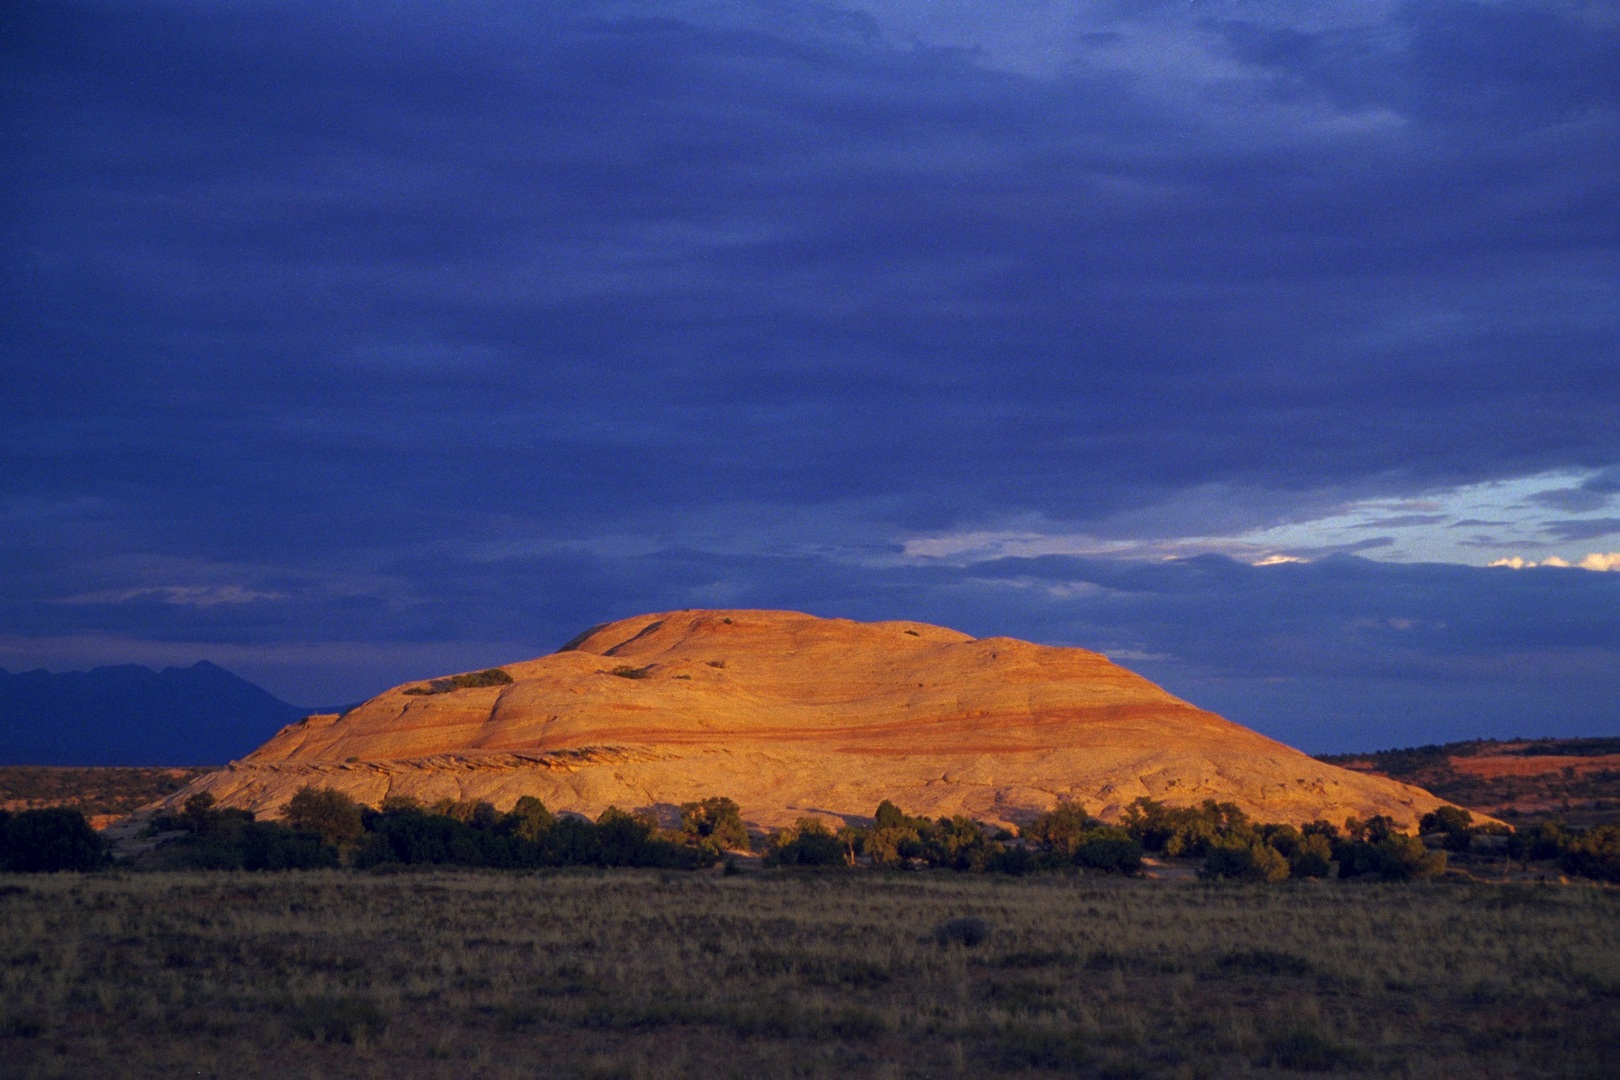
Minolta X-600, 28-135 Tamron zoom
|
|
Obviously, we don't want the camera to balance the color towards neutral; we want it to be golden-red; this is why a thing to remember is to set WB to the "Sunny" (5300°K) preset; maybe even to "cloudy" to give our images even more of the red punch. I'm feeling outright embarrassed saying that: the image above was shot with Auto WB. and I had to spruce it up in postprocessing. I never use Auto WB except for incandescent light, so it must have been an accident. Oops. Sorry. Never again, I hope. I also like to underexpose my pictures under these circumstances. This can be important. If the highlights are red, some may have the total luminosity within the RGB range of 255, but with the red channel overloaded, the detail lost. If you have to stretch the range of an underexposed frame, the resulting increase in noise can be fixed; if you burn out the detail, it is lost forever. (And no, it does not help much if you save images in the raw format.) Note that, just for the heck of it, I'm including here a picture shot on film, back in 1998. I was driving in Utah (or was it Colorado?), with just enough time to stop, get out, and shoot three frames — without even thinking about exposure (or anything else). Well, beginner's luck: got myself a keeper. Golden Hour Portraits Portraits, and photographing people in general, reap huge benefits from the Golden Hour light. It becomes so easy, too easy, that it may feel like cheating. It is not just the red direct sunlight, even if is additionally softened by some light-reflecting clouds. If you are lucky (or smart) enough to have an area of open, but darker, background, it will bring into the picture some blue; perhaps not enough to get noticed, but enough to make the redness stand out more.
|
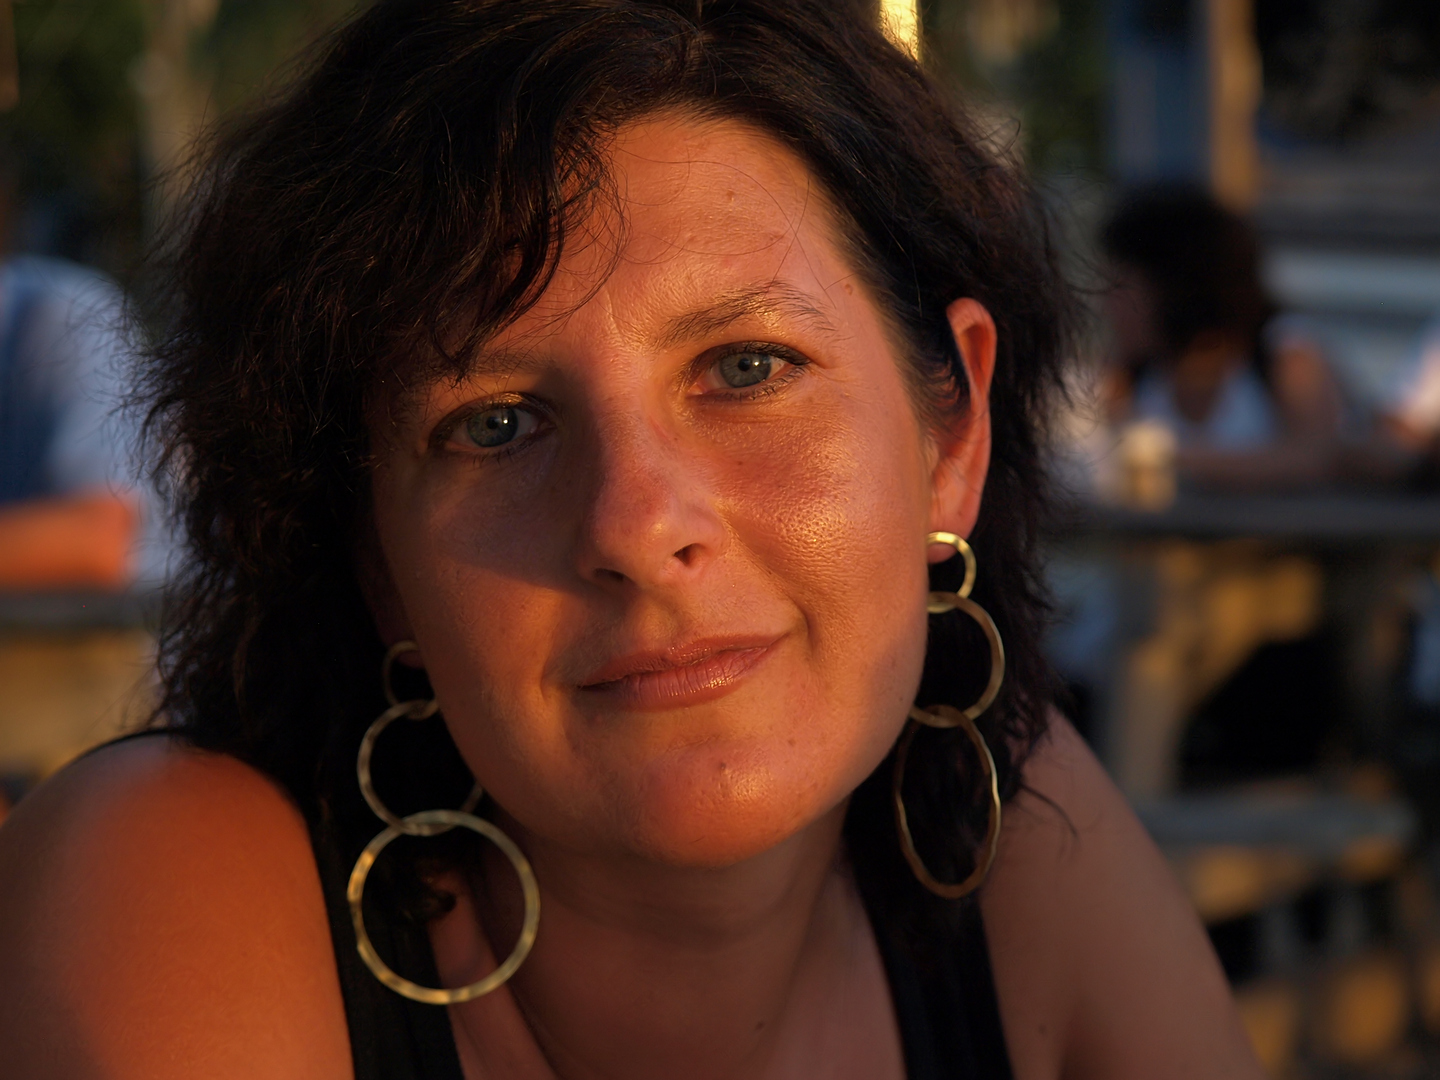
Olympus E510 with ZD 14-54/2.8-3.5 at 54 mm
AP (0 EV): 1/160 s at F/4.5, ISO 800, WB 5300°K |
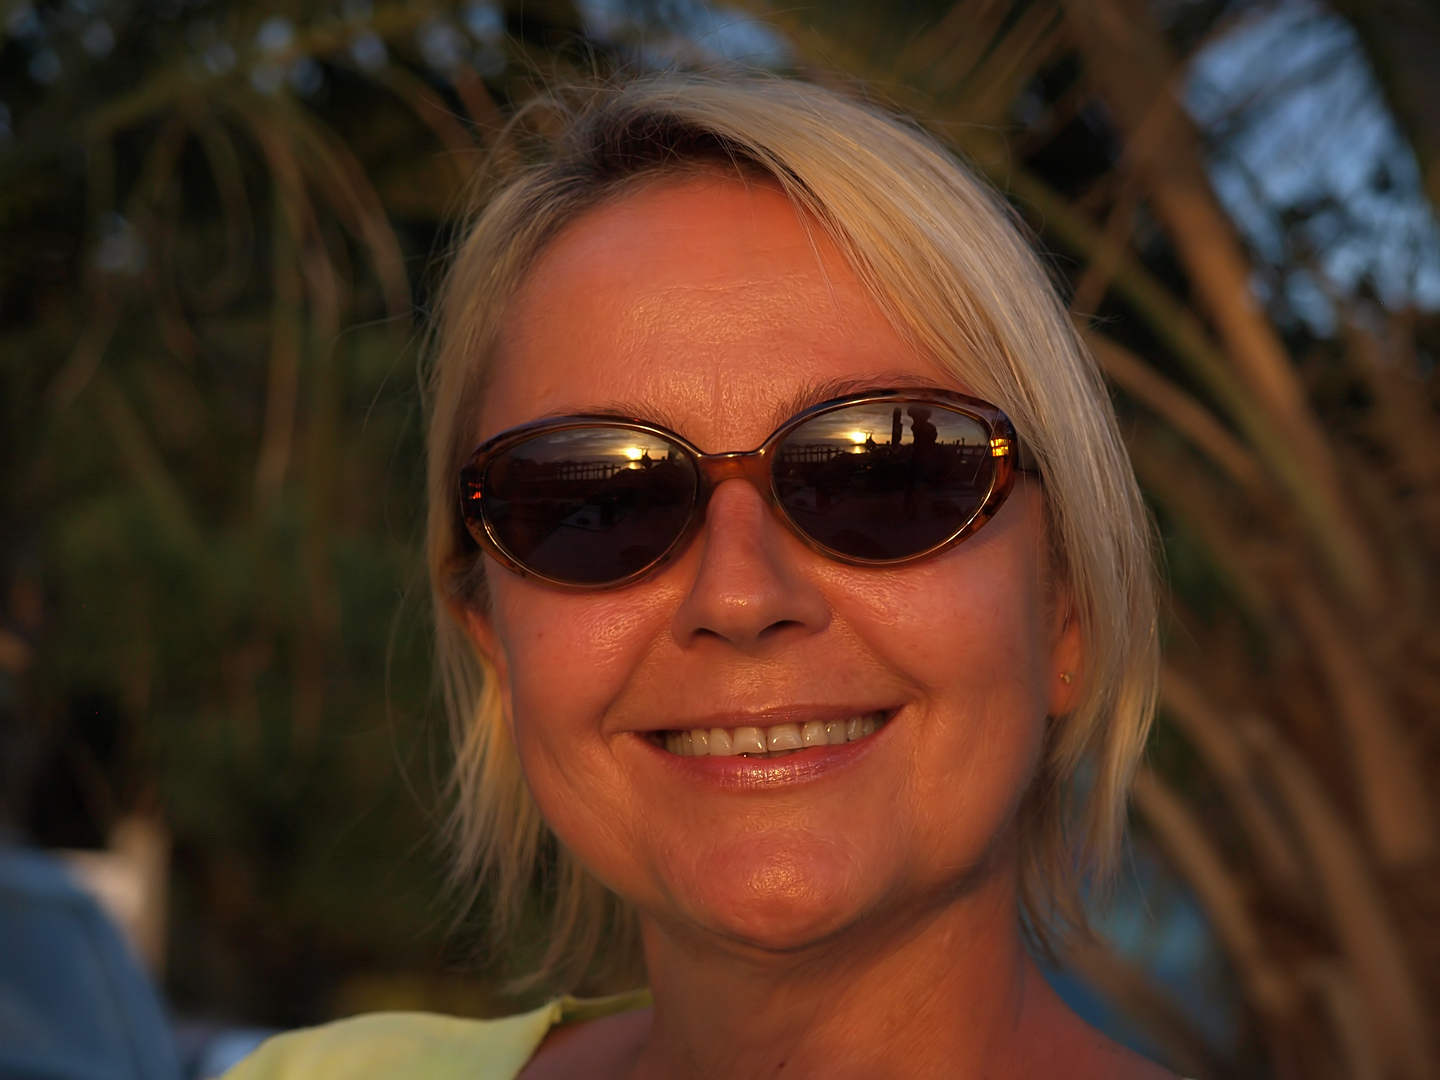
Same camera, same lens
AP (0 EV): 1/200 s at F/4.5, ISO 800, WB 5300 |
|
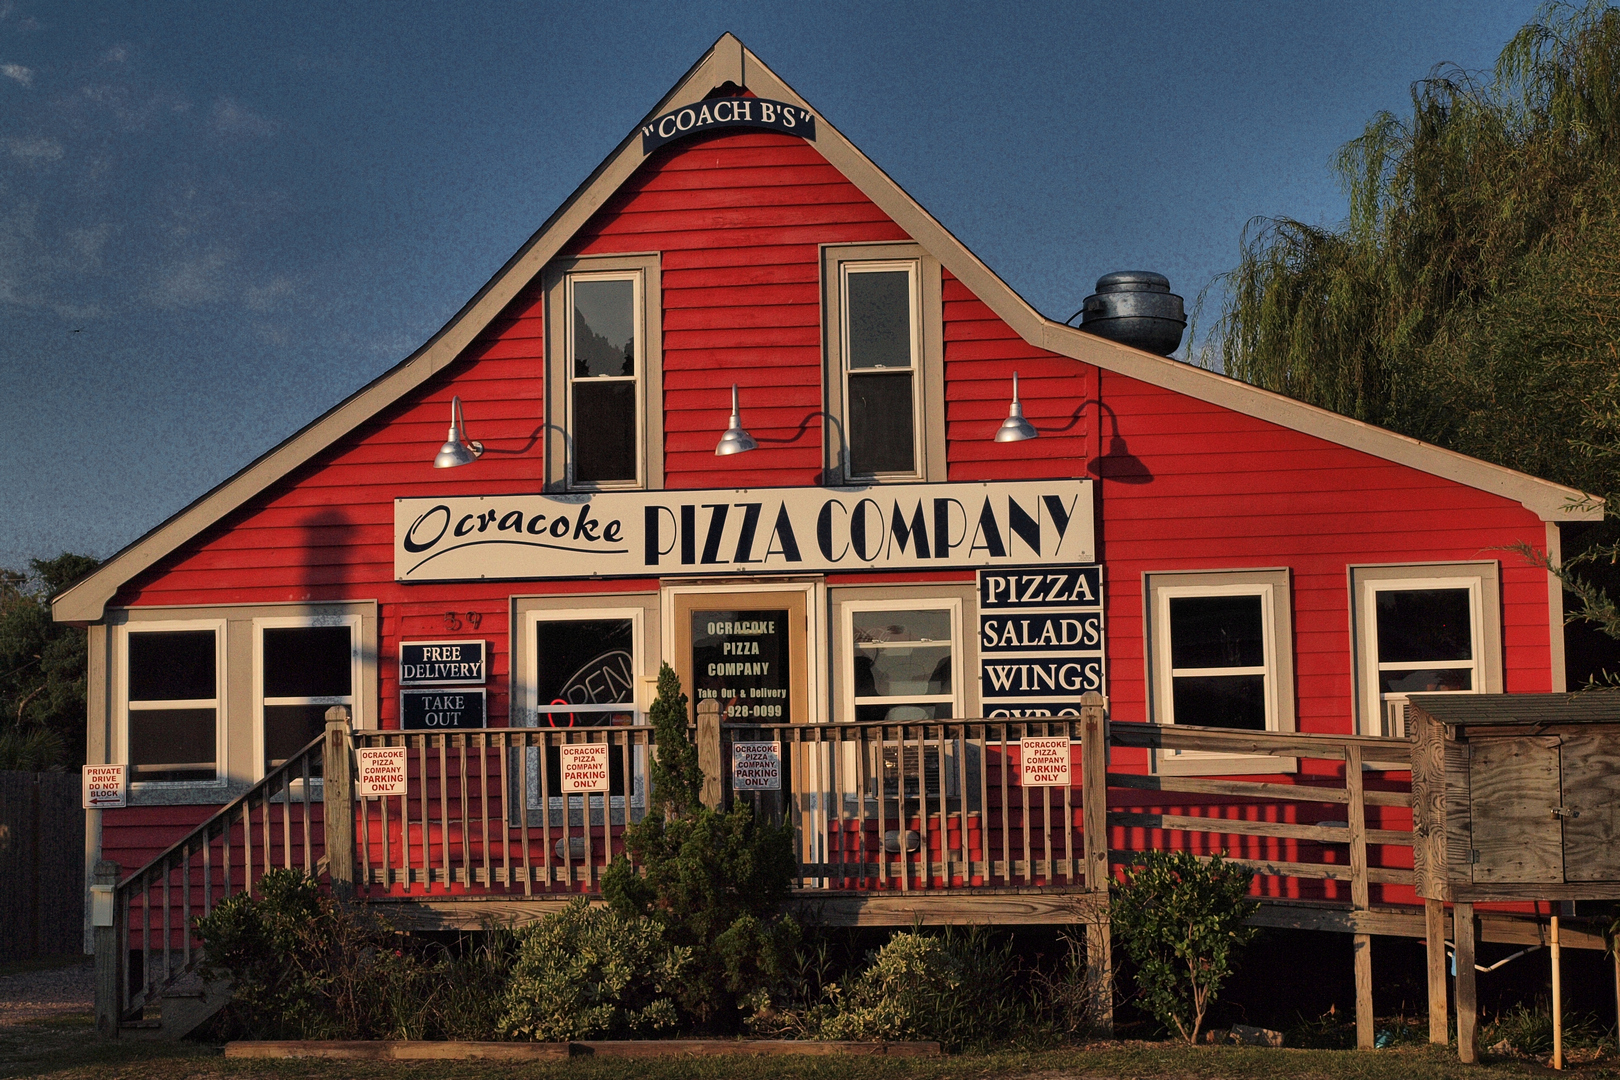
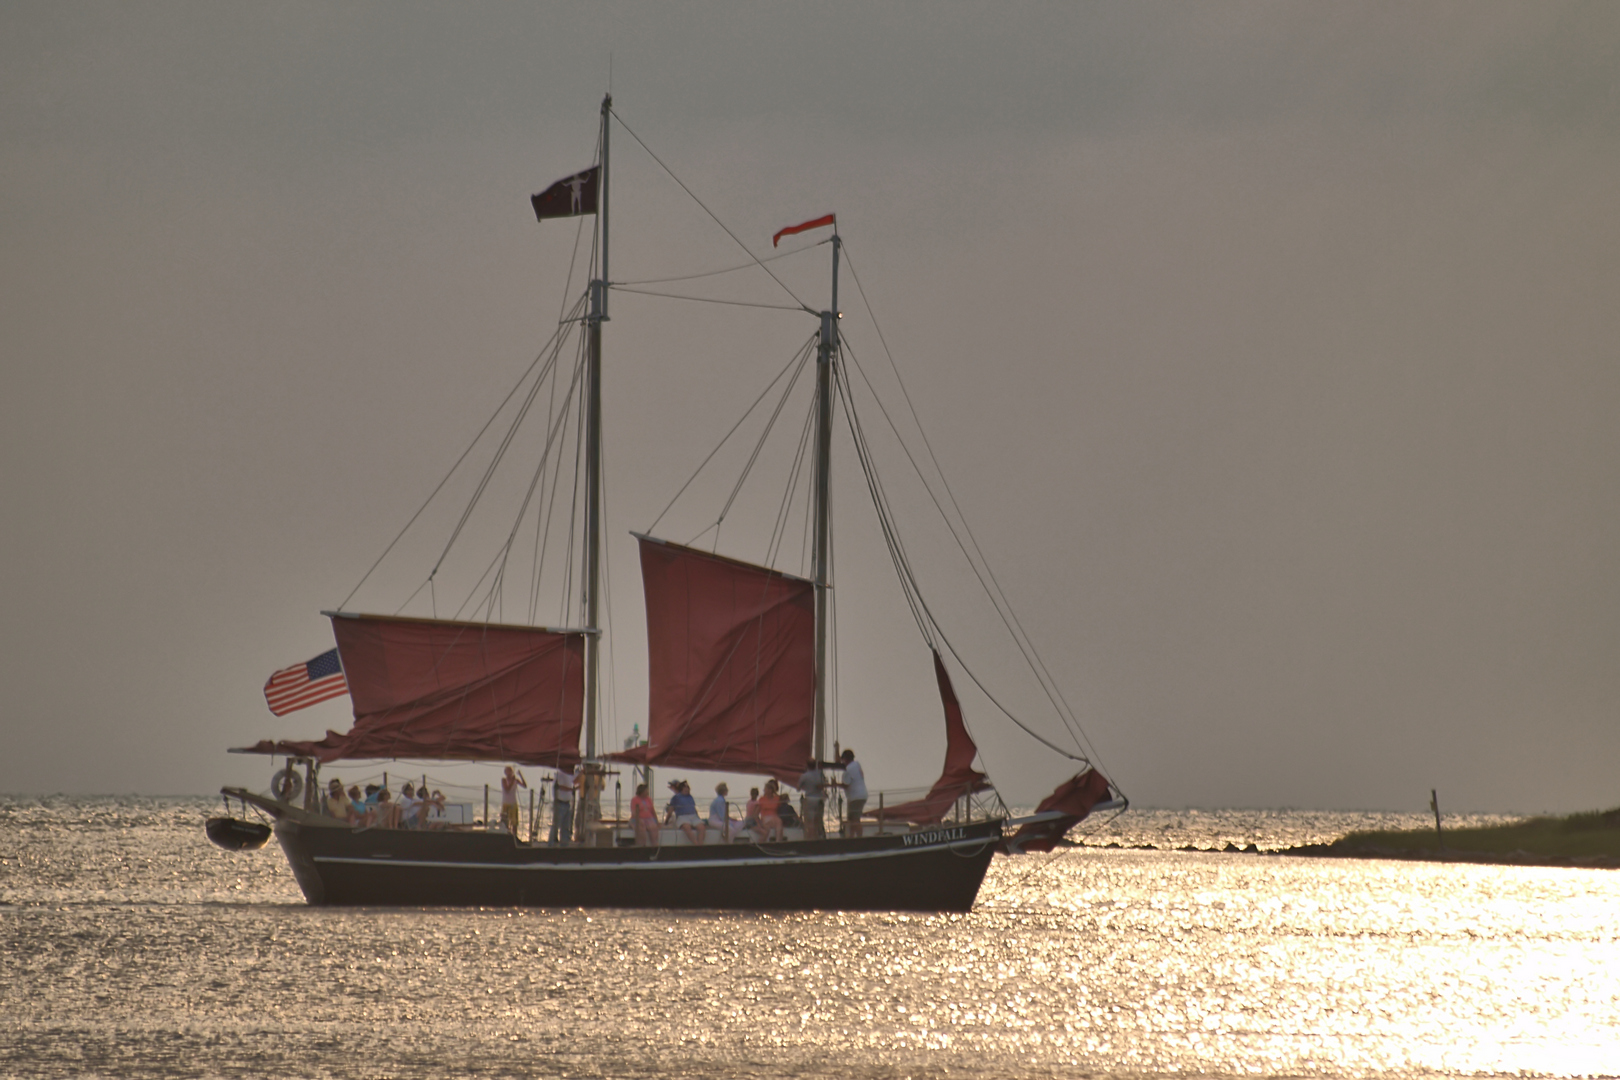
Both these pictures are casual snapshots, taken two minutes apart on a late-summer day (August 23) in a pier restaurant in Ocracoke Village, North Carolina. The village, including its picturesque harbor, is one of the best places I know for Magic Hour photography.
Postprocessing Many of the Golden and Blue Hour images do not require any special postprocessing; just the usual tonal adjustment until you like the result. In some cases, however, the foreground may be dark, with insufficient detail. Opening up the shadows can be attempted with use of Levels or Curves (or equivalent) on most photo-editing applications. I prefer, however, especially for Blue Hour images, to use two other tools available in Paint Shop Pro: Fill/Clarity and Local Tone Mapping. Both are, I believe. included in other photo editors, under somewhat different names. Also, both should be used with caution, especially the LTM which is very easy to over-apply, to the point when it is no longer an image adjustment, becoming rather a special effect. After that I sometimes apply the Hue/Saturation/Lightness tool to adjust a selected color or two. Note: In all examples that follow, I'm listing nor only the image adjustments applied (tools used), but also amount of each, a numeric parameter.If you are using a photo editor other than my Paint Shop Pro 20, even if it has a given (or similar) function, it may be using a different scale than PSP. Eight on a ten point scale is not the same as eight out of 256. Here are all tools/functions used in the postprocessing described here, including the range for each adjusted parameter. This may come handy when you try my procedures on a different software.
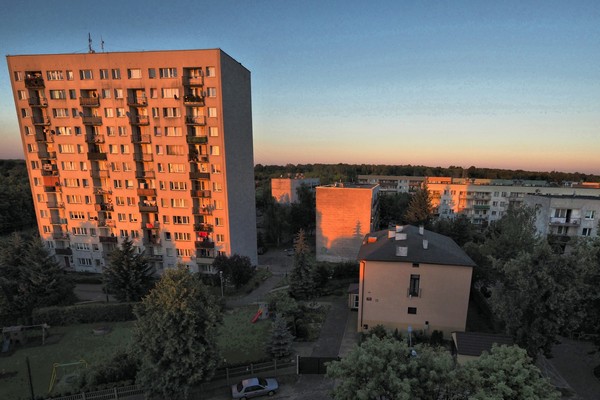
Gold #1: Concrete jungle, Łódź, Poland This one is quite simple: the tall building is evenly lit by the low Sun behind the camera; the only problem is that the foreground detail is largely lost in shadows. This is why am applying here somewhat more Fill and LTM than I usually do.
|
The following image adjustments were used to postprocess this frame:
The final result is presentable, if not enough to quit my daytime job, were I not retired.
| 
Olympus E-M1 Mk.II, Leica 8-18/2.8-4.0 at 8 mm
| Blue #1: Urban landscape, Łódź, Poland This is a perfect example of a blue-hour image, as it includes all three kinds of light which may be present in such scenes: blue (clear parts of the sky), purple/red (sun-lit clouds) and artificial (street lights, windows, etc.) The original in-camera JPEG (#1 in the Flipper sequence) was generated in Natural Picture Mode, contrast and sharpness at -1, Sunny WB. It is somewhat on the dark side. That's the way I wanted it; after all, this is a dark scene. Still, it has visible shadow detail, and for some people this may be the version of choice, no postprocessing needed.
| Here are the stages this particular picture went through in postprocessing. Each corresponds to one frame in the Flipper.
| 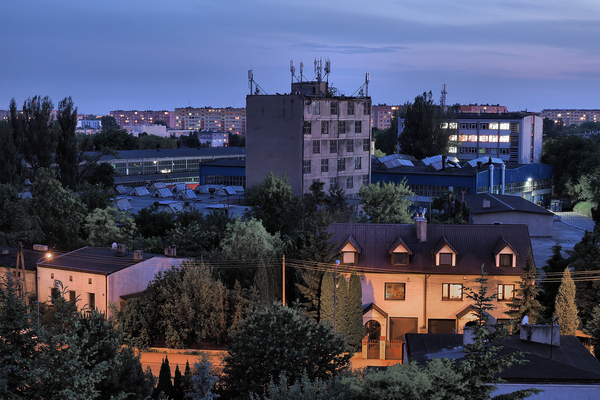
Olympus E-M1 Mk. II, MZD 12-100/2,8/4.0 at 29 mm
| I did the monochrome conversions just to satisfy my curiosity. As expected, the difference between both is quite striking. While the one using blue filter is more to my liking, neither can compete with the color image. Gold #2: Harborside, Ocracoke, NC As a picture, this is nothing special, but it serves well as an example of a water-side Golden Hour scene other than a sunset or sunset-lit sky.
| This postprocessing sequence is slightly different than the others: it uses the HSL tool to raise the Lightness of greens by 30 and to lower that of the blues by the same amount. Here is the whole chain:
One may argue that the final result is a bit too dark. This can be easily adjusted by applying less adjustment in step [5].
| 
Olympus E-500, ZD 40-150/3.5-4.5 at 104 mm
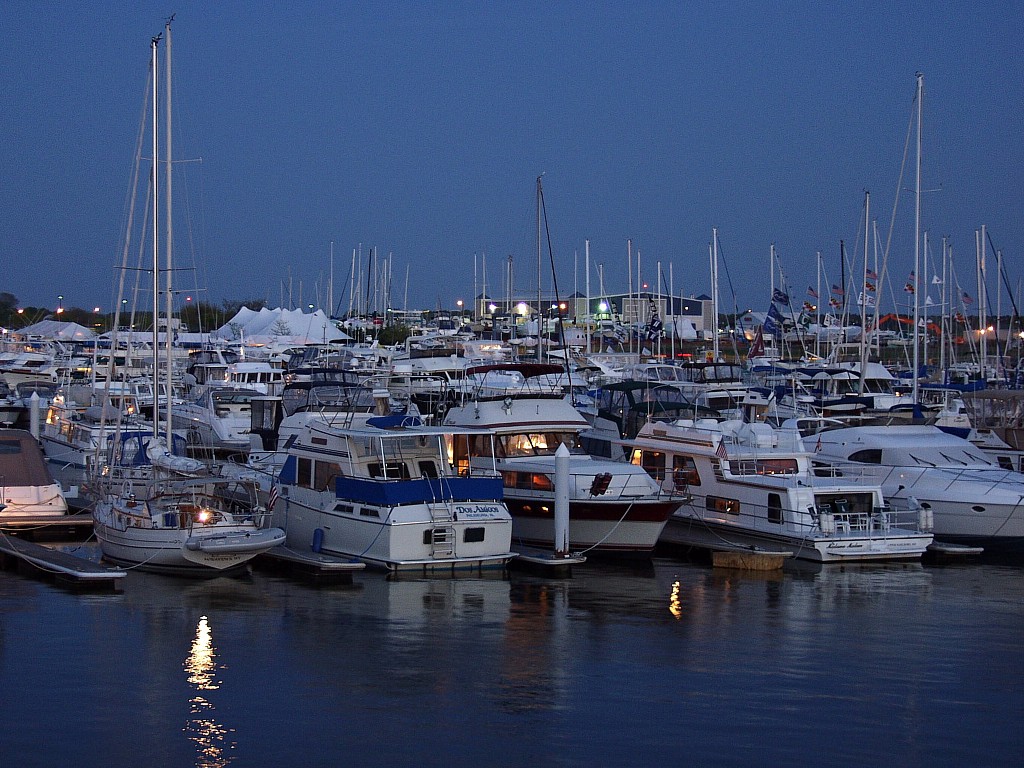
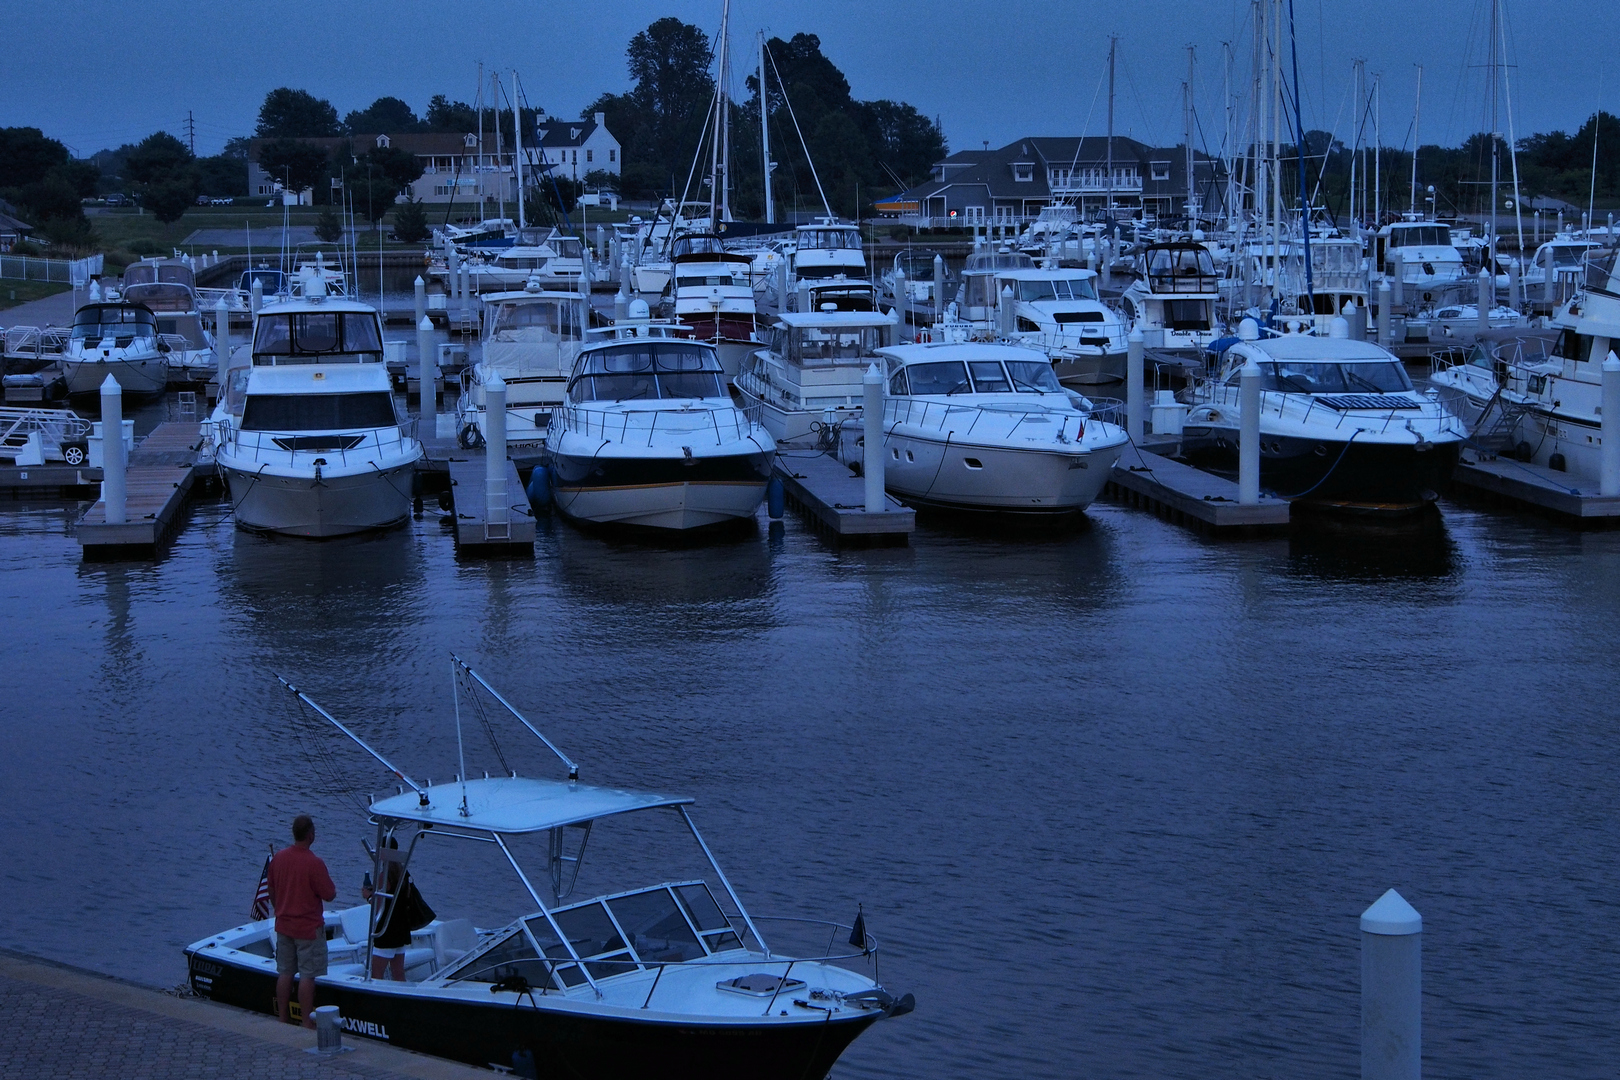
| Blue #2: The Hemingway's Marina, Kent Island, MD One the oldest blue-hour photos in my archives: a marina at the Hemingway's restaurant near Annapolis, MD, shot in May of 2001 at 7:30 PM. | ||||
|
The postprocessing here was minimal:
This looks like a clear Blue case, no admixture of Golden at all. The softness of ambient sky light is quite pleasing. Actually, it was this scene earlier that year, which made me take interest in Blue Hour photography. See also this one, shot deeper into the Blue Hour.
| 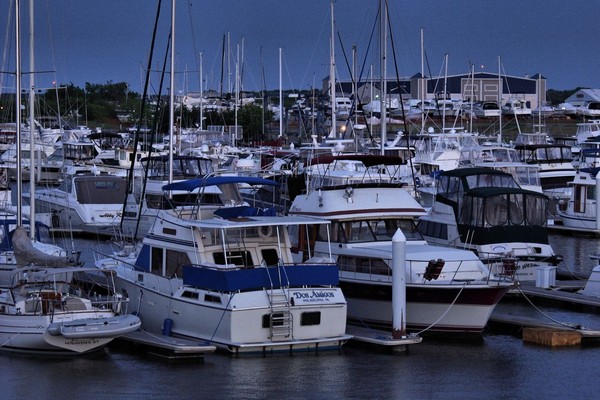
Olympus E-10, 35-140/2.0-2.4 (EFL) lens at EFL=140 mm
| Gold #3: Badlands rockscape, North Dakota Quite different than most Golden Hour scenes, both straight off the camera and after the postprocessing, with a number of viable options for the latter. This is, if I remember right, the Badlands Wall area, near the Door and Window Trailheads, where we had Magic Hour sessions two evenings in a row. The Sun is just about to cross the horizon line: only the tips of larger rocks catch some of it. And here — a Golden Hour bummer! The picture "as shot" is quite disappointing, as the foreground sandstone, illuminated mostly by the blue-sky light, lacks any redeeming qualities, be it shape, shadow pattern, or texture. The tiny sunlit areas are not enough to help. Boring.
|
All we can do is to try to fix this in postprocessing. Here in a sequence of steps which seems to do the job.
This sequence was developed by running five complete chains as the one shown above, but with LTM set to 4, 8, 12, 16 and 20, plus some changes in Curves. This was an attempt separate from the one described in the PSP landscape study.
| 
Olympus E-M1, MZD 12-40/2.8 at 40 mm
|
| Blue #3: More Badlands Another most enjoyable Golden and Blue Hour session, this one a day before the one from the previous Example. One limitation: I took no tripod along. The picture I chose to show here was shot well after sunset (8:03 PM, September 20). Together with some of its neighbors, it exhibits one peculiar feature: the sky is quite blue near the horizon, becoming more pink higher up, both in pastel shades.
|
This is how that frame, and similar ones, were postprocessed.
To preserve that pastel, blue-and-pink tonality, I've decided against LTM in postprocessing, leaving it as an option; have a look. See also another frame from the same series.
| 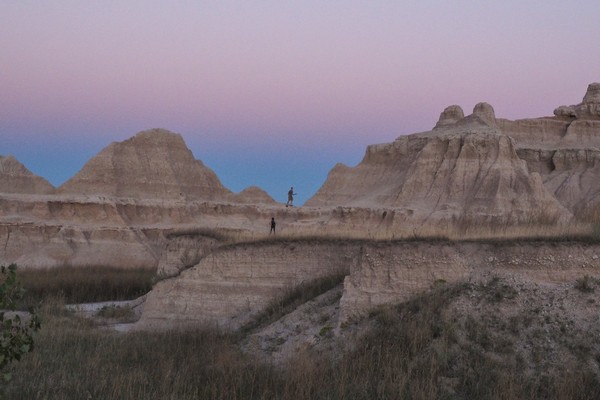
Olympus E-M1, MZD 12-40/2.8 at 27 mm
|
| ||||
|
|
Back to the Photo Bytes section, with articles on computer applications in photography. |
| Home: wrotniak.net | Search this site | Change font size |
| Posted 2018/05/31; last updated 2018/06/07 | Copyright © 2018 by J. Andrzej Wrotniak |