Take a Picture of the Moon

Here is some advice on how you can shoot the Moon with your digital camera, without any specialized equipment; I am also showing a number of examples using various Olympus cameras in my collection.

The first example is a casual snapshot of the Moon, shot on February 15, 2009, 2:50 AM, from my patio near Annapolis, MD.

I used the Olympus E-30 SLR with the 70-300 mm F/4.0-5.6 ZD zoom at 300 mm. Manual exposure: 1/1000 s at F/8, ISO 800. Shot from hand, with a fence as support, camera's image stabilization active.

Postprocessing in Corel Photo-Paint: noise cleanup with Neat Image plugin, contrast adjustment, sharpening. (There is no visible chromatic aberration at disk edges: the lens performs nicely here.)

I chose ISO 800, because I needed a fast shutter speed for a handheld shot. With a tripod, I would set ISO 100 or 200, closing the aperture down to F/11.

At this focal length the Moon disk fills 21% of the frame height; the sample at the right was reduced to 69% of the full pixel scale. Click on the image to see a 1024×768 fragment without resizing.

Another example using the same lens on a different camera; this time a full frontal (almost). Pictures of full Moon are less dramatic, as the light is flat, not showing the crater detail, so nicely visible in the previous example near the terminator.

This was shot with the Olympus E-510 (same lens, also at 300 mm). Manual exposure: 1/250 s at F/8, ISO 200, medium-weight tripod. Postprocessing as above.

The brightness of the disk in a matter of an aesthetic choice. In this picture I decided to keep it higher than in the previous one.

The E-510 has a ten-megapixel sensor; 20% less than the E-30 used above, which translates into the Moon diameter being 10% smaller (measured in pixels). This is one of the applications where a higher pixel count really helps (assuming the lens is good enough to use it).

The image at right was reduced to 76% of the full pixel scale; see also the XGA-sized, 1:1 fragment.

Now an example of a budget solution (not that the previous one required any expensive gear). Here is a picture taken with an Olympus E-300 equipped with an inexpensive Sigma 55-200 mm DC zoom lens and the Olympus TCON-17 attachment on top of it.

The combined focal length is 340 mm (equivalent to 680 mm on a 35-mm film camera), as described in my Not-So-Big Mama article.

The manual exposure was computed using the "sunny 16" rule: 1/100s at F/16 and ISO 100, which turned out to be a bit too low (stretched in postprocessing). Focusing was manual, a tripod was used with a four-second mirror lock.

This image was been reduced to 73% of the full pixel size. In the whole image, the Moon covers about 23% of the frame vertically.

The picture has been submitted to some postprocessing: tonal equalization and sharpening. An XGA-sized crop of the full-size image can be found here.

As you will see, with some ingenuity (and heavy glass) you can do better than this; two such examples are included further down in the article.

Camera and lens

Almost any camera, digital or not, can be used — under one condition: it has to have (or be able to use) a lens of a focal length large enough to provide sufficient magnification.

What "long enough" means here depends on what size of the Moon will you find acceptable in your picture.

For digital camera lenses we often use the so-called "equivalent" focal length (EFL), denoting the focal length (mm) of a 35-mm film camera lens which has the same angle of view. So, for example, the Olympus C-5060WZ and C-7070WZ of cameras use a 5.7-22.9 mm zoom lens termed as 27-110 mm EFL. This means that the lens gives the same range of angles as a 27-110 mm lens on a 35-mm film camera.

For many non-SLR digital cameras the focal length multiplier is 4 to 5; for most ones using the APS-C format — close to 1.6, and for the Four Thirds (Micro or not) — 2. Obviously, for the so-called "full frame" cameras the multiplier is 1 (i.e., not needed).

Multiply the "equivalent" focal length (mm) by 0.0352, or, roughly, divide it by 30, and you will see how much (in percent) of your frame will the Moon fill vertically. Here are some examples for the more common focal lengths.

EFL, mm 100 140 200 300 400 600 1000
Vertical frame fill, % 3.5 4.9 7.0 10.6 14.1 21.1 35.2

Note: these are values for cameras with a 4:3 image aspect ratio; for those with a 3;2 aspect (35-mm film, most digital SLRs) the values are higher by a factor of about 8%; the coefficient value is 0.0381.

The computations behind the 0.0352 coefficient are given in the Appendix.

Obviously, size matters. While 200 mm seems to be a reasonable minimum, the bigger the better. A few digital cameras have really long zooms (some models from Sony and Olympus go up to 400 mm equivalent), sometimes even with image stabilization to avoid handheld camera shake — these can be used to shoot Moon pictures right out of the box.

With a film camera, or a digital SLR, you may use a teleconverter to get a 2× gain in the focal length. For non-SLR digital cameras you may be able to find a telephoto lens attachment providing such a gain, provided your camera accepts such attachments (many do). Of course, most of digital SLRs allow you to use any long lens you can fit on them, whether made for a digital model or not. <=p> Because, even with a long lens, the Moon fills just a fraction of the frame, you will usually want to crop the picture significantly. This works better if you have lots of pixels to start with. A twenty-megapixel camera will make it easier than a five-megapixel one. The lens, however, has to be good enough to fill these pixels with detail. Some "superzoom" cameras boast high pixel counts (above 20 MP), but their integrated lenses may have quite low resolution, especially at the long end. This will result in smooth (no pixelization) but fuzzy cropped images.

Using legacy lenses on digital SLRs

If your digital camera accepts legacy lenses (i.e., ones originally designed for film SLRs), these can be put to a very good use. Because the digital sensor is smaller than a film frame, the equivalent focal length (EFL) will be greater than the actual one. This is especially significant for the Olympus Four Thirds SLRs (the E-System) where the equivalence ratio is 2× for most other models the multiplier is 1.5× or 1.6×.

Here is a most impressive example, taken by Morten Øen from Norway with use of the Olympus E-300 digital SLR, equipped with a classic 800 mm, F/8 Konica Hexanon lens: hand-made, 2-element construction (quite rare!).

(The lens had to be slightly modified to be mounted on the camera; Morten says this is a five-minute procedure.)

Manual exposure was 1/60 s at F/22, ISO 100, auto white balance. Taken fifteen minutes after midnight on August 24, 2005, in Kristiansand, southern tip of Norway (58°N). The Moon was about 50 degrees above the horizon.

At the 1600 mm EFL the Moon should fill about 52% of the vertical frame dimension; my measurements show 56%; quite close, but outside of the error margin. It looks like the Hexanon is slightly longer than the claimed 800 mm.

The shown image has been tonally adjusted (just a tad!), cropped, reduced in size, and re-sharpened. For those who would like to have a look, here is a full-size, unmanipulated original (converted from raw ORF format to JPEG).

Image © 2005 by Morten Øen

The classic piece of glass is performing very nicely; there is some of chromatic aberration at the top-left edge of the disk (visible in the original as a cyan fringe at the left edge of the disk), but not much, easy to desaturate in postprocessing. This is common at these focal lengths.

At the left is a 1:1 pixel sample from Morten's shot. I would say the lens makes use of the 8 MP sensor in the E-300.

An XGA version (cropped, reduced, re-equalized) of the same picture also shows how the chromatic aberration effect was fixed by desaturating the cyan component of the disk fringe.

Exposure

There are two simple rules to be applied here.

  1. Don't use any autoexposure modes (program, aperture, or shutter priority) — switch to full manual.
  2. Follow the first rule — or else.

There are two reasons behind these simple rules. First, your metering circuitry will average the exposure over the night sky (most of the frame) and the bright Moon in the center. This will result in a hopelessly overexposed frame. Even if you have a spot-metering mode in your camera, you'll not avoid this, unless you are using a 400 mm or greater focal length.

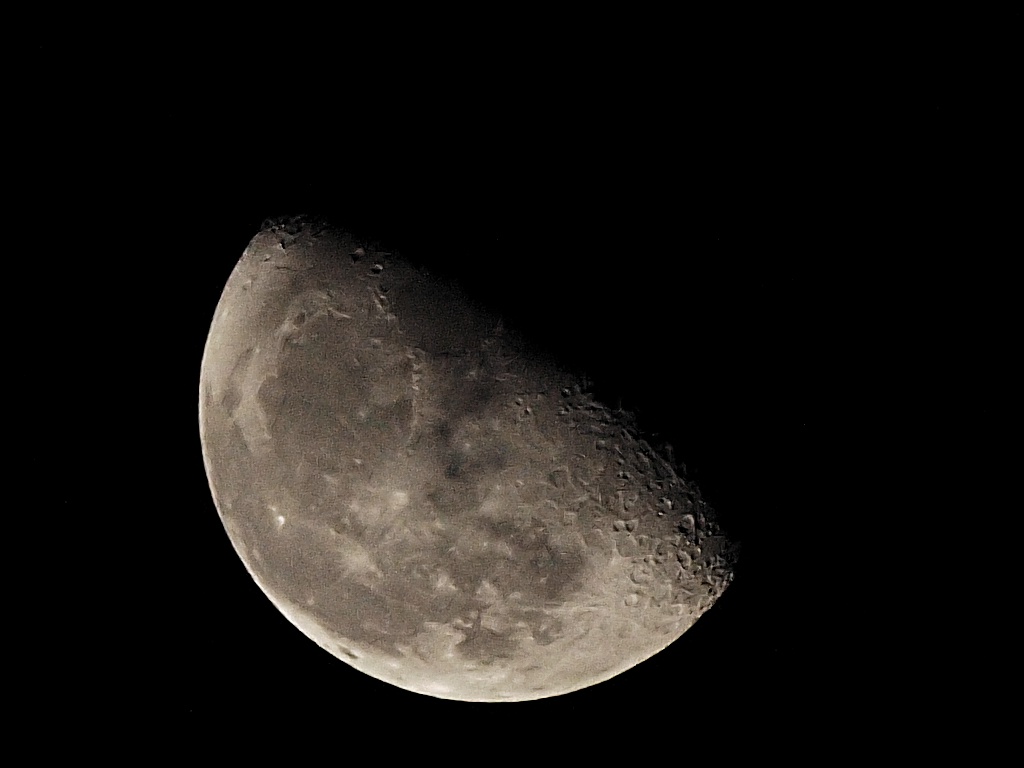
Second, the Moon happens to be one of the easiest subjects to set the proper exposure for — manually, that is. Note that it's distance from the Sun is almost the same as Earth's, and it has no clouds. Therefore the daylight moonscape (and if we can see it at all, it is daylight!) is illuminated very much like an Arizona desert on high noon. We can use the "sunny 16" rule here: with the aperture of F/16 set the shutter speed to one over the ISO rating.

In reality, this rule usually needs a correction: I found that the results are better if the exposure is twice as long, or the aperture one F-stop wider. Thus, rather use a "sunny Moon F/11 rule" instead: at F/11 the proper shutter speed is one over ISO rating. (The reason may be light scattering in the atmosphere, but I'm not sure.)

Some Readers may not believe me here. "How come? The Moon is so far, 384,000 km away; does not the light decrease as a square of the distance!". Yes, but so does the apparent Moon's size (more exactly: the solid angle), so that the amount of light per steradian (or per pixel) remains the same, regardless of what distance we're shooting the Moon from. Remember: we are not using the Moon as the source of illumination (the Sun is that), but as the subject of the picture. If we moved the Moon twice as close to the Earth, my exposure values would stay the same, although the moonlit scenes on the Earth, true, would be four times brighter. Got it?

Most of digital cameras use ISO 100 as the basic setting. This means that the right exposure at F/11 would be 1/100 s. This is, in turn, equivalent to F/8 at 1/200 s, F/5.6 at 1/400 s, or F/4 at 1/800 s, and these are the settings you can choose from to be assured that the Moon will be exposed properly, unaffected by the dark sky around it.

While these shutter speeds sound perfectly handholdable, this may not be the case. You may have to increase the ISO setting and/or activate your camera's image stabilization, or (preferably) use a tripod. Let me explain.

There is a well-known rule of thumb, that the longest handholdable shutter speed equals to the reciprocal of the EFL (equivalent focal length). Therefore, say, if you are shooting at EFL of 400 mm (many superzoom models offer this length), 1/400 s should be fast enough, right?

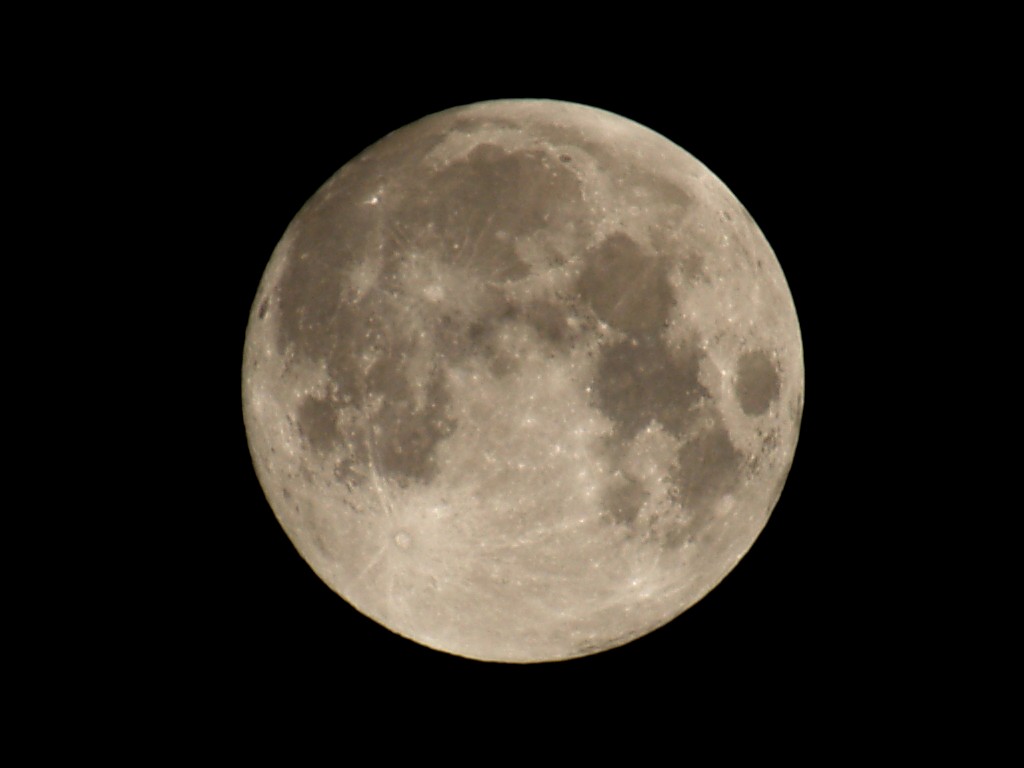
Not quite. This rule assumes that you're viewing the full image from a "normal" viewing distance (usually assumed to be equal to the image diagonal). But your Moon at 400 mm EFL takes just 14% of the frame height (see the table above), so you will probably want to crop the picture to 20% (linear) or so. This magnifies all detail (including any camera shake) by a factor of five, being equivalent to extending the focal length by that factor. Your handholdable shutter speed becomes not 1/400 s but 1/2000 s, quite a different story!

The simple arithmetic behind this makes the focal length irrelevant in favor of the apparent Moon size in the final (cropped) picture. Another rule of thumb should be then used: if the Moon fills more than 50% of the final (cropped) picture height, the hand-held exposure must be 1/2000 s or shorter, regardless of the focal length.

You are no longer shooting at ISO 100 and 1/400 s, but rather at ISO 400 and 1/1600 s or so. And raising the ISO is not free: it adds noise to the image, especially in compact cameras. (The in-camera noise filtering will help with that, but at the expense of image detail; you can run, but you can't hide!)

Image stabilization (the real one, not just rising the ISO sometimes advertised as IS) will help here, and it seems to work more efficiently at the longer focal lengths, exactly where we need it. It may allow you to handheld a shot at shutter speeds 2× or 4× slower (1 to 2 EV, how this is often expressed) — but don't expect miracles: the 5 EV (32×)improvement comes from the marketing department, not from the lab!

For best results, especially on small-sensor cameras, use ISO 100 or 200 and a tripod. If you don't have a tripod handy, try at least to get some support (a fence, top of a car) and shoot a number of frames, to select the one showing least camera shake.

If you are using an SLR, remember that the effects of camera vibrations caused by the mirror are amplified proportionally to the lens focal length. If your camera has mirror lockup (mirror going up some time before the actual exposure), use it, especially for EFL of 300 mm or more.

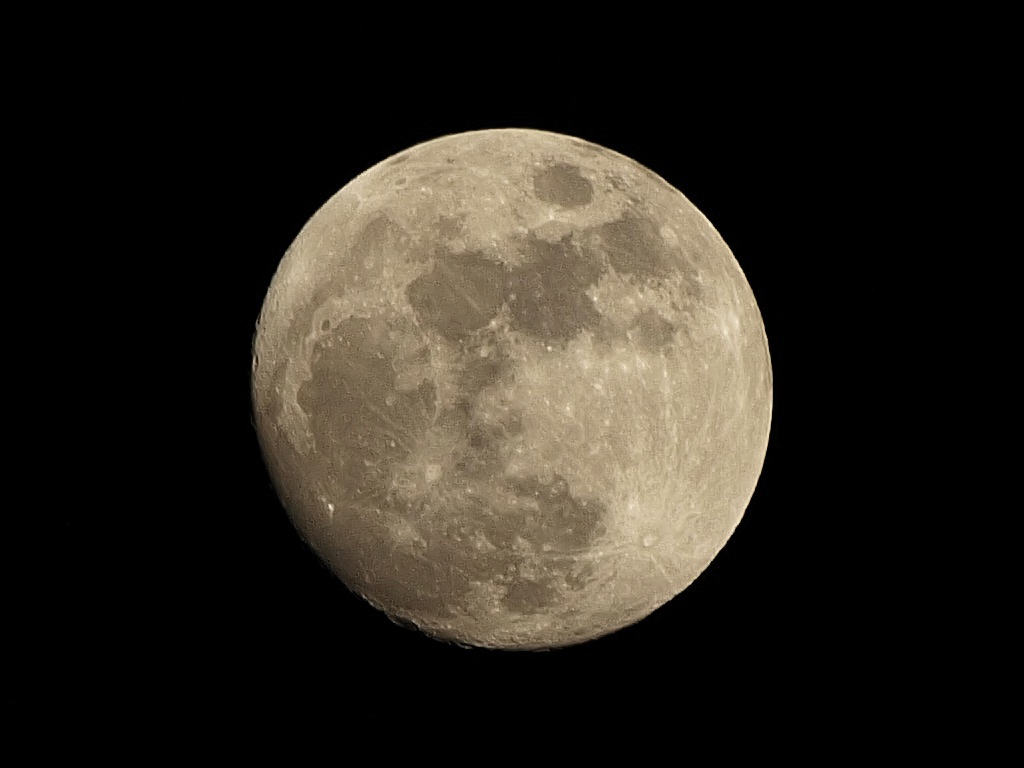
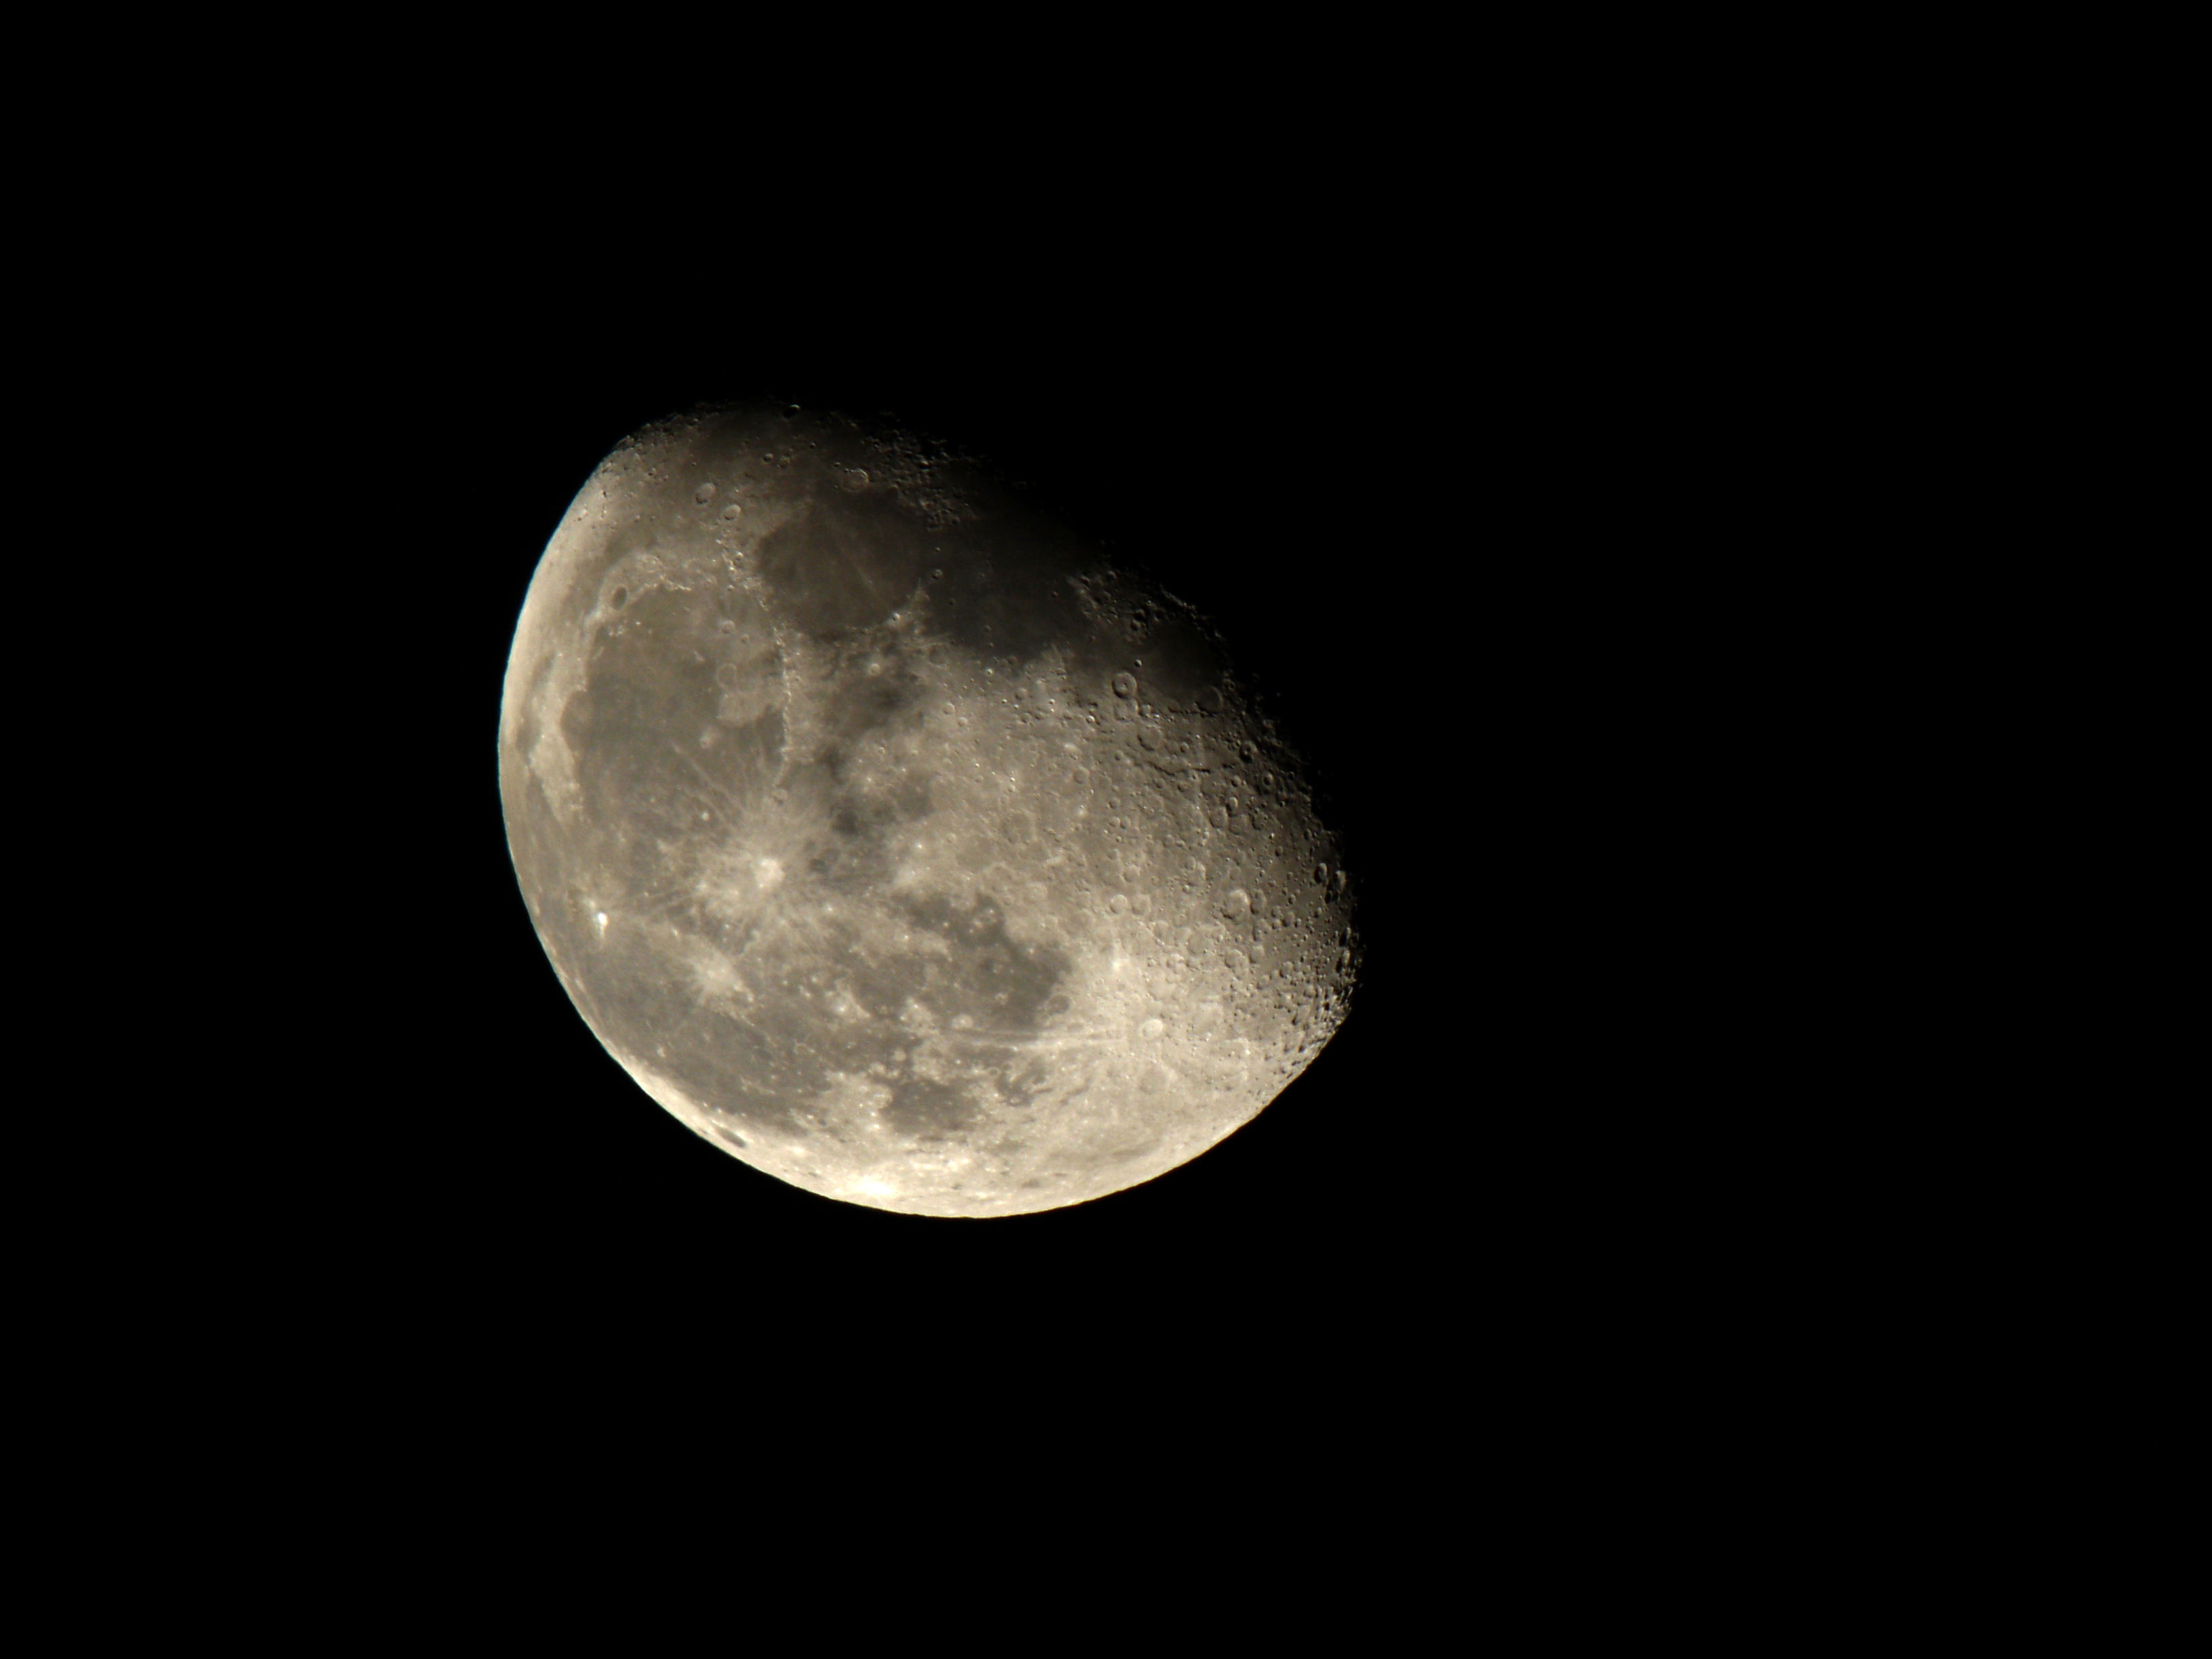
Note: the Moon's apparent motion (about 360 degrees per day, or 1/4 of a degree per minute, or one Moon diameter per two minutes) is much too slow to be a concern at the shutter speeds we're talking about. For example, with the Moon diameter being about 1200 pixels in the picture above, we would need to expose at about 1/10 s to get a one-pixel motion blur. And this is with a 1600 mm effective focal length, and an eight-megapixel image size!

And finally, if your camera has manual focusing, switch to it and set the focus for infinity (or, in case of an SLR, focus manually). Be aware that many lenses will allow you to manually focus past infinity, especially (but not only) when a lens attachment or a legacy lens is used.

Postprocessing

The picture straight from the camera should be quite presentable, with a significant amount of detail, but it may need some postprocessing in an image editor. The Moon's image suffers passing through Earth's atmosphere, which degrades the contrast quite a lot, and, to a lesser extent, sharpness as well.

Some equalization (stretching the brightness histogram) will help a lot without any loss of detail. Unfortunately, it will also enhance the visible image noise. This is not a problem if you shoot at low ISO settings.

Increasing the image contrast a bit (by applying an S-shaped adjustment curve) is a tempting option, as it gives the picture more impact. We have to remember, however, that it also may lead to some loss of shadow detail; this is especially visible in the terminator area (i.e., the transition between day and night areas of the Moon).

Be prepared to see some chromatic aberrationon the borderline between the sunlit Moon surface and the sky (that's where it is usually best visible). This is normal, unless you are ready to cough up $7000 for a 600-mm or longer prime lens. If you find this effect objectionable, convert your picture to monochrome; instead of the color fringe, you'll have just some unsharpness, much less visible. Another option is to use a mask brush along the affected line and desaturate the relevant color components of the image in the masked area (usually green/cyan, or purple/red).

If you are using a film camera, don't expect your prints look any good when they return from the photofinisher. The lab's computer, very much like your camera's autoexposure, will be fooled with the black sky, and the Moon will be burned out. Don't worry, the detail is still there, on your (manually exposed) film. Scan the film in high resolution and do the printing yourself; you will be amazed with the results.

Get out of town

With a really long lens (like the ones used in the pictures shown here), and with a tripod used to avoid camera shake, the detail in your picture will be limited by how much air is there between your camera and the Moon, and how clean this air is.

There is one kilogram of air above you (assuming you're close to the sea level) per each square centimeter — and that's looking vertically (if the Moon is 45 degrees above the horizon, the light path through air is about 40% longer). This is roughly equivalent to a glass pane four meters thick, or to ten meters of water!

Humidity, dust, and density fluctuations (most significant in the lower part of that layer) all degrade the quality of your image, reducing contrast and sharpness. Therefore observing some common-sense rules may greatly enhance the quality of your Moon shots:

  • Get out of town to avoid pollution, dust, and the scattered city light. Your pictures taken in West Virginia will be much clearer that those from suburban Maryland.
  • Get to the mountains. At the altitude of Denver, Colorado (1500 m above sea level) the air layer above you is reduced by about 20%. This is a lot, remembering that these are the warmest, most humid, and usually most polluted and density-fluctuated 20%.
  • Choose dry weather: humid nights (even without visible mist) are worse than dry ones. Arizona will be much better than the East Coast.

Remember that even if you can enhance the lost image contrast in postprocessing, you will be also enhancing, to the same degree, the inherent sensor noise of your camera. The same holds about sharpness enhancement, therefore the less postprocessing you need to apply to your image to make it presentable, the more presentable it will be.
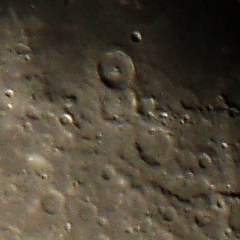
Use a telescope

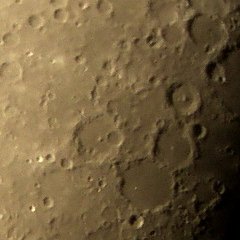
My friend Hong Zhao from England found an old telescope in her friend's closet (well, actually she married him since). She dusted it off, and used her Olympus C-300Z (the same as the D-550 in the U.S.) to get this wonderful picture.

The programmed exposure was 1/50 s at F/2.9 (full aperture); the zoom was set at F=6.6 mm (EFL=33 mm), i.e., at the wide end. At this focal length the Moon was filling almost the whole frame height.

The camera was handheld, looking into the telescope eyepiece.

The telescope itself was a home-built Newtonian type, with a 16 cm mirror and F/8 aperture, 20 mm Kelner eyepiece, no equatorial drive.

The shooting location was Hampshire, England — not so far from London, and this is, I believe, Hong's first effort at astrophotography.

Click on the image for the XGA version. (Hit the F11 button of your browser, to enjoy a full-screen view.)

Image © 2005 by Hong Zhao

The picture is, I think, awesome, and has been made without use of scope adapter, even without a camera tripod (the scope itself was tripod-mounted, of course) — just a point-and-shoot, albeit a smart one.

The tiny, three-megapixel camera did a very respectable job; a native-resolution, full pixel size fragment of the frame is shown at the left. There was no need for much postprocessing, except for some equalization, adjusting the tonal curve for lower gamma, and some sharpening. (The original was shot at contrast and sharpness at lowest levels, to allow for more latitude in postprocessing.)

This clearly demonstrates how much you gain by using a telescope, even a relatively simple one. If you have an old Meade or Celestron gathering dust, get it out and start playing.

The Moon phase — why it matters?

A "full frontal", i.e. the shot of full Moon, shows us the whole visible side, but the light is least pleasing. At full Moon, the Sun is almost directly behind the camera (read: Earth), and this leads to uninspiring images; the Moon surface is rather flat and the detail weakly accentuated.

Wait until the Moon face is only partially lit. Yes, you lose some of the visible real estate, but the terrain is made more three-dimensional because the light direction is now different than that of the lens axis. You can see the difference in the pictures shown here.

But why?

A good question. We have just one Moon, and it looks always mostly the same. Your pictures will be very much like mine, or anyone else's.

If, however, you enjoy photography as much as I do, you will not need a rational answer. To quote George Mallory: "Because it's there". For fun, and for bragging rights.

More resources

Search the Web and you will certainly find something of interest. Here are two references to sources I found both educational and entertaining, and more than worth a prolonged visit.

  • Astrophotography with Digital Cameras by António Cidadão may be a little outdated, but is, nevertheless, very informative (and the laws of optics do not really change). It is a part of Antonio's amazing Lunar and Planetary Observation and CCD Imaging Home Page, where even ignorants like myself will want to spend quite a while.
  • There is a rather in-depth article on photographing a Moon with a digital camera, written by Jeremy McCreary and posted on his excellent dpFWIW Web site, a trove of information on digital photography. While I may argue on some minor technical points, the article remains a great source of information (like most of Jeremy's articles). Check it out by all means.
  • John Murphy from England (his 'scope was used for Hong's picture above) has a Web site with a large number of high-quality astronomy pictures, including detailed Moon shots and some most impressive pictures of galaxies. Make sure to have a look even if your interest in the subject is casual.

Appendix: The frame-fill coefficient details

Let us introduce the following notation:

  • D — the Moon's diameter;
  • R — its distance from the photographer;
  • f — the lens focal length;
  • d — the diameter of the Moon image;

In these terms, there is an obvious relation: D/R = d/f, In other terms, the size of the Moon image will be

d = fD/R         [1]

For R I'm using the value of 379898 km, which is the mean radius of Moon's orbit minus the mean radius of Earth (6371 km), the latter divided by square root of two. This corresponds to a photographer located on the Earth surface, with the Moon 45° above the horizon. The averaged Moon diameter, D, is 3474 km.

Basically, the equation [1] is sufficient for all estimates, except that digital camera sensors differ in size, and many of camera users are not quite sure what their frame height is. In this case you could just use the EFL (focal length expressed in terms of a 35-mm film frame), always given by manufacturers, and get the frame fill factor (percentage of the shorter dimension filled with Moon diameter) as

p = feqD/hR × 100%         [2]

The value of h is 24 mm for cameras with 3:2 image aspect ratio (all digital SLRs and ILCs except Olympus and Panasonic, all 24x36 mm film cameras), and 25.96 mm with the aspect of 4:3 (almost all others). This confusion is due to the fact that EFL is computed with use of the frame diagonal, not its height.

If you really have to know: 25.96 has been derived as 3/5×sqrt(24²+36²), for obvious reasons: the "equivalent" frame is 24x36 mm, and 3/5 is the ratio of the longer side to diagonal in the 4:3 frame aspect.

Anyway, numbers in the table above were computed according to [2], with h = 25.96 mm.


An earlier version of this article has been included, with permission, as a chapter in Digital Photography Hacks by Derrick Story, published by O'Reilly in 2004. The copy editors, however, botched the job, removing the capitalization from names of celestial bodies. Our school system, again.

Recommendations of third-party vendors of lens attachments were also added in the printed version by the book editor, not by me.


Home: wrotniak.net | Search this site | Change font size

Photo News | The Gallery


Posted 2001/11/09; last updated 2018/02/14 Copyright © 2001-2018 by J. Andrzej Wrotniak.