
|
|
|
Insane Panoramas
|
|
My other articles related to the |
|
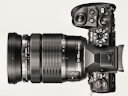
The Missing Panorama Mode? Really? In the E-M1 Mk.II Olympus (finally!) removed the Scene Modes, as not really useful to advanced amateur — the intended user. Good riddance. Still, some camera owners are unhappy about a "feature" being taken away from them. This is rather a misunderstanding. In fact, the panorama mode was doing close to nothing; just three minor things:
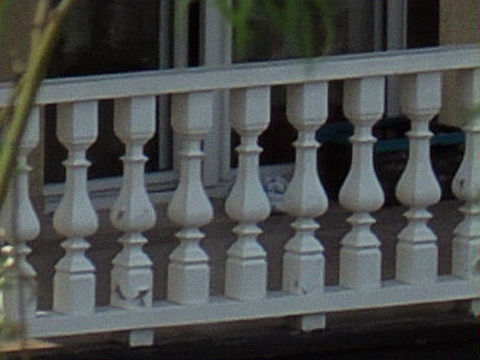
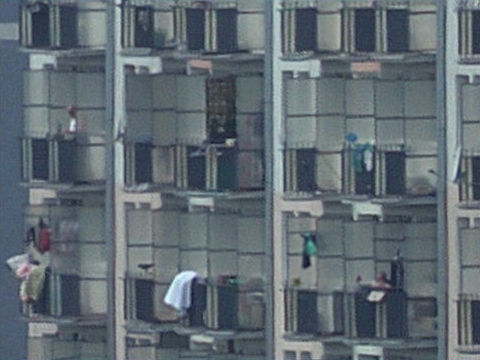
Actually, point [3] above was an improvement from the original design, where the camera would write the flag only if the xD-Picture card used was of the Olympus brand; no technical reason or explanation whatsoever. That was outrageous. None of these three functions is essential; all that is needed can be done easily without a special "panorama mode", therefore this advice applies to any digital camera, as long as it offers a manual exposure option or an autoexposure lock toggle. A tripod, while not strictly necessary, will help a lot: it can be used to do "dry runs" of the panorama angle, adjusting the tilt as needed. Before the first frame, use the AF once and switch to manual; also change to metered manual to set the exposure somewhere in the brighter part of the panorama angle (or use AE lock set as a toggle). Now you are ready. Part two is actual shooting. Without a tripod, you have to watch it so that the lens axis does not follow a wave pattern. If it does, even just a little, you lose some of the precious height of the panorama strip. Making sure the frames overlap is easier: in each shot some object which in the previous picture just entered the frame from one end, has to be close to leaving it at the opposite edge. It is better to provide too much overlap than too little. Now, stitching. This is done off-camera, on a computer, using some specialized software. Olympus Viewer has a stitching function, but it works only with image files containing the "secret flag". No go. Doing panoramas only occasionally, I never had a motivation to research stitching software. The functionality provided by Olympus as a part of their application (under various names), while not anything special, was getting the job done in a dependable and easy way. Now I had to find a replacement: easy to use, dependable, and (if possible) providing better, whatever that means, results. I hate it when this happens. Who's riding that white horse? The rescue came from the least-expected direction: Microsoft. More exactly, Microsoft Research Computational Photography Group (they change names from time to time). This is a stand-alone application, named Image Composite Editor (or just ICE), and it was my clear favorite among five such programs I've tried. More, ICE is free and can be downloaded from Microsoft's Web site. ICE is very powerful, but most of this power is hidden under the hood. It will match not just linear sequences of frames, but also rectangular grids, which may result in multi-gigabyte images. It seems to handle properly stitch lines between frames, a problem plaguing most (maybe all?) other stitchers. And using it is a breeze. A really excellent application — and from Microsoft!. Last time I used the words "excellent" (or similar) and "Microsoft" in the same sentence and without a negation in-between, was 1984, and it was in the context of the Microsoft FORTRAN compiler. Ronald Reagan was in his first term. While the Olympus program was generating quite good results, the Microsoft application does a better job, especially at matching the neighboring frames and their perspective geometry. There is one small thing to remember, if you want to save some time and effort. When you drop the component images into the program's window, set the Camera Motion parameter to Rotational Motion — don't leave it at the default Auto-Detect. Then keep clicking on [Next], or whatever button serves that purpose), until you get to the next vital decision, selection of the cropping rectangle, and then the final one: choice of output format and size reduction. The cropping rectangle you choose may include areas not covered in your (possibly irregular) sequence of frames; ICE will try to recreate the missing parts using some mix of interpolation and black magic. In some of my experiments this turned out to be a lifesaver; in some — a joke. To save a panorama as one large image file, we must choose to choose a file format capable of storing the image size involved. This may be quite painful: above 550 MP or so, ICE will write panorama files in one format only: Adobe's PSB (Phptoshop Big). That format is, however, obscenely inefficient; for example, a 560MP image takes 4.2 GB of disk space; for comparison, a 510MP image stored as a JPEG file uses between 40 and 200 MB, depending on compression applied. A standard panorama The scene subject was the view from a 7th-floor balcony, overlooking a somewhat chaotic part of city outskirts (Łódź, Poland). Having used this scene before for lens evaluation, I liked the amount and variety of detail it has; when inspecting the panorama pictures, I discovered things I never knew were here. Shooting conditions and parameters: The time was around 5 PM, bright, but no direct sunlight, white/gray sky. Exposure: metered manual (0 EV), 1/1000 s at F/7.1, ISO 200, WB 5300K. The JPEG engine was in Natural Picture Mode, sharpness and contrast at -1, noise filtering at Low. The lens used was MZD 12-100/4.0 Pro at 47 mm. 13 pictures were taken over the whole 180-degree arc of camera rotation. Postprocessing:
Stitching was done in ICE on in-camera JPEGs. The resulting panorama file (after minimal cropping) was The resulting image was used to generate all size versions of the panorama by proper scaling and a careful touch of Unsharp Mask (1.25/50). That was done in a single run of the editor (PSP X9) to avoid multiple save/load sequences and multiple sharpening of the same image. The results, accessible via the links below, exceeded my expectations. While you may have a quick look at the Screen Size version (useful with a slow connection), it is only with the Safe Size one (see below) when you start seeing things, reading a picture like you read a book. The Safe Size is a version reduced to 90% (linear), which is the largest size handled, as of this writing, by current versions of all six Web browsers I have tested. |
|
13 Standard (20 MP) in-camera JPEGs
Screen Size: 10 105×800; 8.1 MP, 2.5 MB | Safe Size: 43 200×3 420, 148 MP, 24 MB |
|
The full-size stitched panorama file is also available, providing even more of delightful detail. Your browser may, however, fail to display it, as the image is quite large. If this is the case, you may right-click on the link. download the file, and use any image viewer.
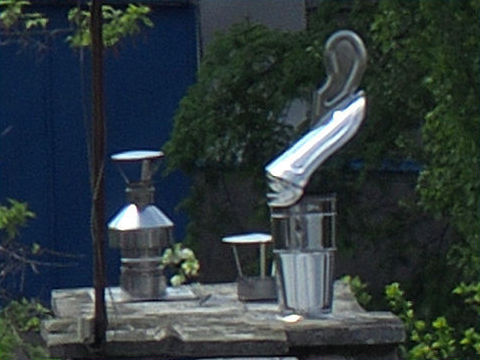
As of this writing (May, 2017), MS Internet Explorer, Edge, and Firefox were able to show my 182MP JPEG, while Opera, Chrome, and Safari were having problems on a Windows 10 computer with 8 GB of RAM. This looks like some arbitrary limitation of the "nobody ever will..." type, as the system still had lots of memory left when this was happening. Reducing the image size to 148 MP allowed all browsers to handle it just fine (if with an occasional hiccup), at least on my system. High Res Mode Images in Panoramas Now, wasn't that nice? We can, however, go and try even nicer. What about combining the panorama stitch technique with the High Res Mode, available on the E-M1 Mk. II? Stitching 50MP images instead of 20MP ones would bring the panorama size close to half a gigapixel. If the lens can fill that with detail (and it should), we may get some impressive images to view! But wait, why stop at 50 MP per frame, if we can go for — Geronimo! — 80 megapixels? If the camera is set to save raw (ORF) files, alone or aside JPEGs, we can use the Olympus Viewer software to convert them into 80MP images! This takes more than two minutes per frame on my not-so-old gaming laptop, which must be the reason why the feature is not available in-camera. I haven't tried this option in my High Res experiments, either. There is always a first time. OK, so here is a plan, I said. We do the session using the Raw+JPEG save option. Then we develop ORFs into 80MP JPEGs and compare them against the 50MP ones from the combined save. If they are better, great. This means we haven't run into the barrier of lens quality (or camera shake, tidal forces, indigestion, whatever). If they are not, we fall back to the in-camera, 50MP JPEGs, still making a difference. That's what I did. The next day's shooting session went uneventful (except that there was some direct sunlight). The zoom was at 50mm (not 47) this time, but a 6% difference is not really meaningful, especially when we do not compare samples from both sessions.
The 80MP JPEGs derived from ORFs seemed, at the first glance at least, to have more detail than 50MP ones, so there was no need for Note of May 16, 2017: Further investgation proved this to be a false impression. Now I believe the 80MP files contain practically no new image information over that in 50MP ones upsampled to that size. No harm done, though, my panoramas are just 60% bigger (by pixel count) than they need to be... Stitching of 13 frames took more than 12 minutes, not unexpected. There was one unpleasant surprise, though. The panorama image, being 667 MP in size, could be saved only in one format: Adobe's proprietary PSB (Photoshop Big), taking 5.4 GB of disk space. The reason seems to be simple: the JPEG standard is limited to less than 216 (which is 65 536) pixels to a side; actually, the limit seems to be 65 000 or very close; I suspect a programmer hardwiring an approximate value somewhere in the code. With that in mind, I did the stitching again, this time using only 8 frames (I could have cropped the image in ICE, but wanted to follow the original procedure). ICE did its job flawlessly again, and I ended up with a panorama of 65 000×7 800 pixels, or 507 MP. From that I generated the Screen Size and Safe Size flavors, like before. For this panorama, the Safe Size image had to be reduced to 50% (linear) from Full Size, as the latter is larger in High Res Mode. I also added the Easy Size, scaled down to 30%. This can be used if your browser chokes or stutters on the 50% version. Yes, you give up a wealth of visible detail, but better this than nothing. |
|
8 High Res (80MP) JPEGs
Screen Size: 6 667×800, 5.3 MP, 1.2 MB | Safe Size: 32 500×3 900, 127 MP, 22 MB | Easy Size: 19 500×2 340, 45 MP, 9.2 MB |
|
This time there is only one browser capable of displaying the Full Size panorama image: the Edge by Microsoft (if it only had a full-screen mode!). For all others, the link below has to be used for download only.
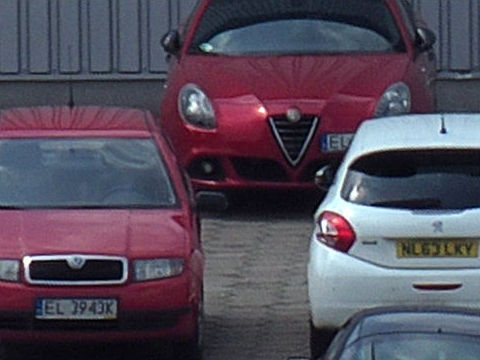
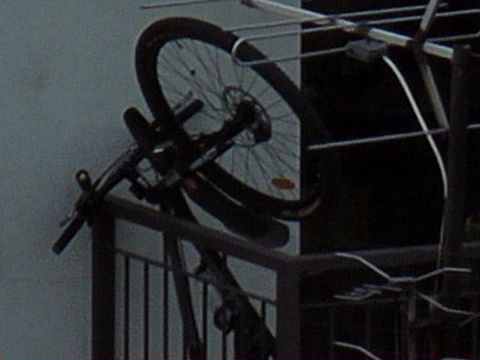
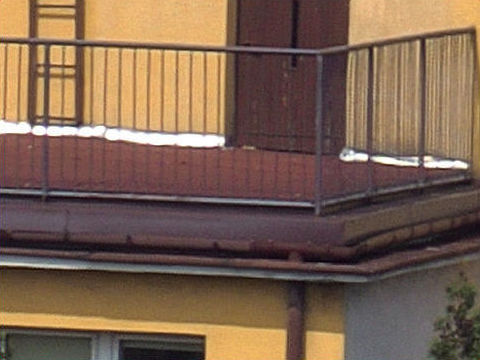
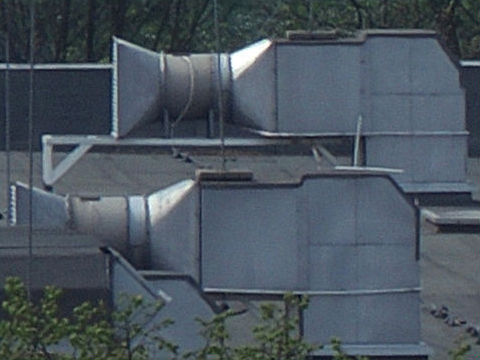
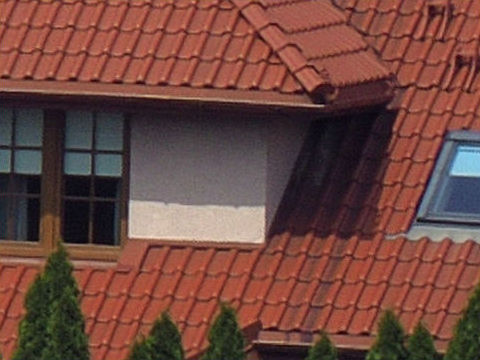
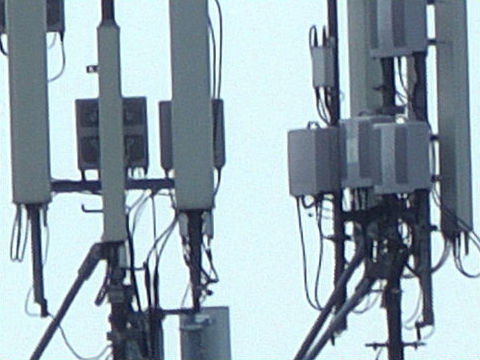
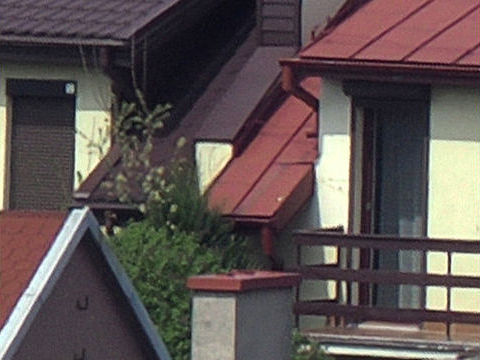
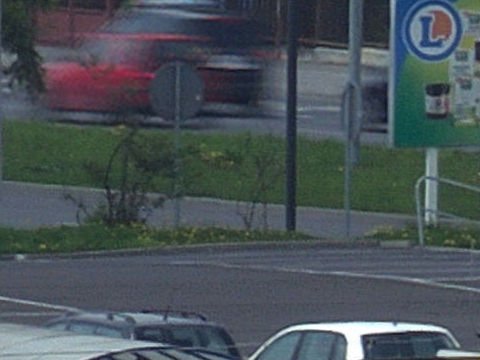
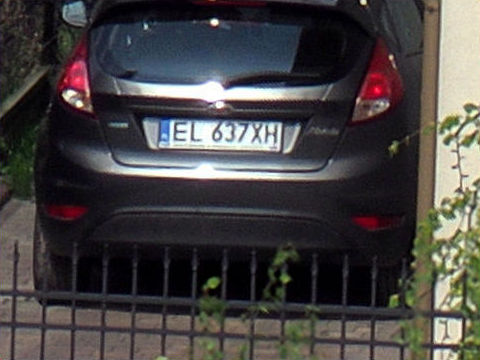
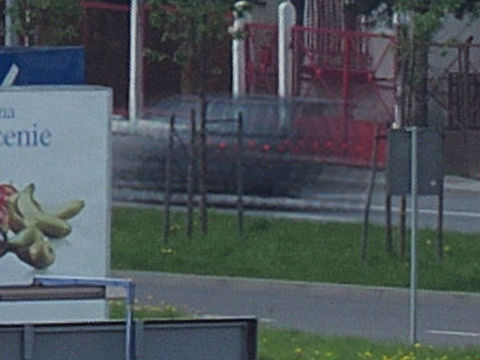
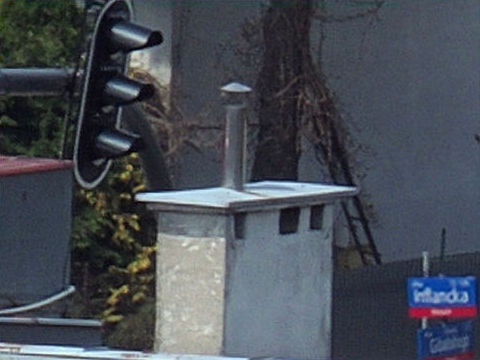
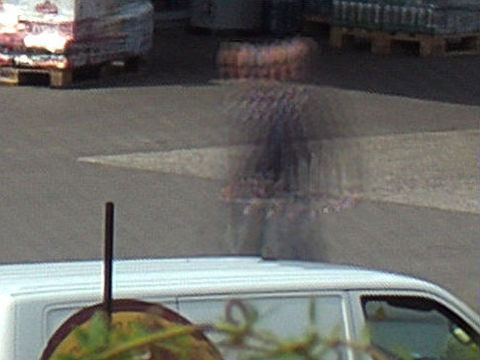
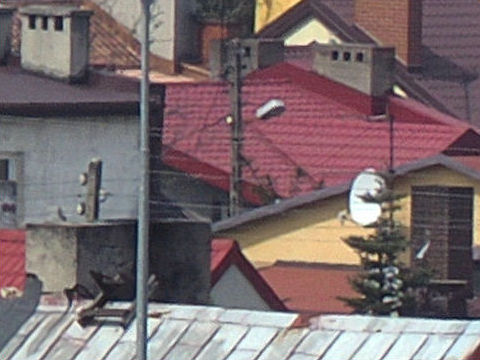
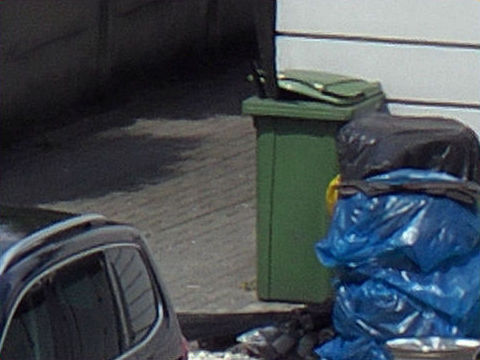
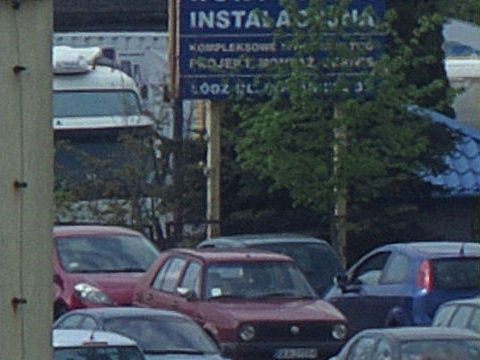
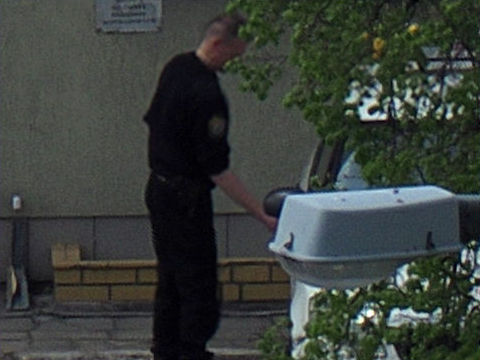
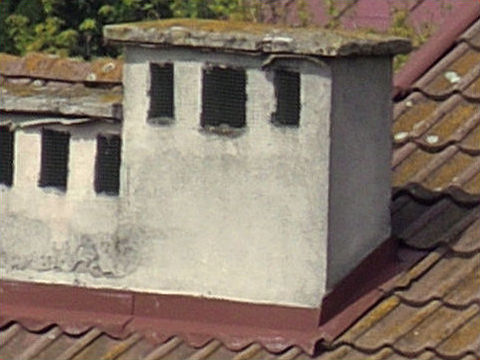
As you can see (assuming you took the pains to download the full-sized version), the amount of detail in this panorama is not just great: it is breathtaking. Scrolling through it in the screen can make you dizzy. And, most of all, the sensor-shift artifacts are few and not nasty. Equally important is that crossing the half-gigapixel line gives me some bragging rights. Well, not as much as one gigapixel would, but always. Where is Waldo? For those unwilling to download the full-size file but still interested in seeing some High Res 1:1 samples, here is a selection of 20 fragments. Some of them were chosen to show sensor-shift artifacts (highlighted numbers), some others — because I found them impressive or interesting for any reason. Just for the heck of it, if you have a few minutes to kill, open the Safe Size or Easy Size image and try to find where the samples come from. Some locations are obvious, some not. |
| 1 |
|
| 2 | |
| 3 |
|
| 4 | |
| 5 |
|
| 6 | |
| 7 |
|
| 8 | |
| 9 |
|
| ||
| 11 |
|
| 12 | |
| 13 |
|
| ||
| 15 |
|
| 16 | |
| 17 |
|
| 18 | |
| 19 |
|
| 20 |
|
What does this all mean? Here I am supposed to say something important, informative, and witty about how all this will affect our lives and the humanity in general. Not now, though. I'm still digesting the load of information gained while working on the project, especially (but not only) about manipulation of large bitmap images. When I'm ready, I will write this section, announcing it, as always, in the News page. Till then. |
|
|
My other articles related to the |
| This page is not sponsored or endorsed by Olympus (or anyone else) and presents solely the views of the author. |
| Home: wrotniak.net | Search this site | Change font size |
| Posted 2017/05/13, last updated 2017/06/29 | Copyright © 2017 by J. Andrzej Wrotniak |

