

...or to Infrared Photography
|
Infrared Photography with the Olympus E-510 (Applicable also to the E-410) |

|

|
Back to the Olympus E-System...
...or to Infrared Photography |
|
The E-510 has one significant advantage in infrared photography: it allows for direct, electronic scene preview on the LCD monitor, something impossible on most digital SLRs (except for a few models by Olympus and the Canon EOS D1 Mk. III). This means that in order to take a picture in infrared it is no longer necessary to do the image composition without the IR filter, and only then (with the camera on a tripod, of course) put the filter on, and actually release the shutter, taking the filter off and repeating the procedure every time the camera was re-pointed. This is a great plus. The remaining question is: how sensitive is the E-510 in infrared (read: how long exposures are needed), and how is the quality of resulting images. That's what I will try to answer here. Let me start from showing you a typical example, from the first IR session I had with this camera. |
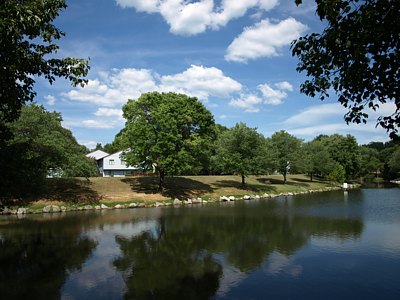 [1] The Crofton lake, late afternoon, without the IR filter. |
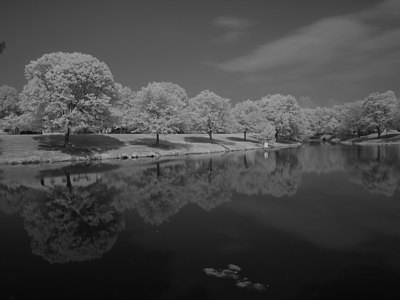
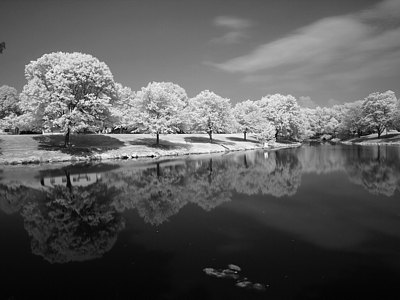
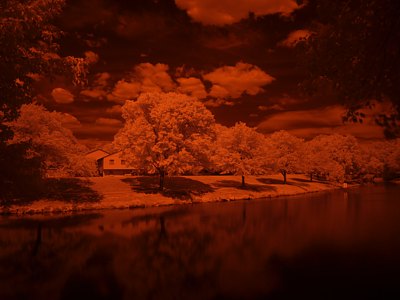 [2] The same scene, with the R72 filter. Aperture priority (+5 EV): 0.625 s at F/3.5, ISO 100, everything else as in [1]. Reduced and re-sharpened only. | |
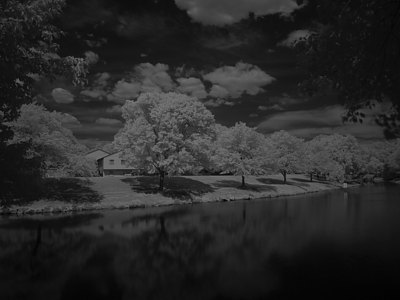 [2a] Frame [2] after desaturation... |
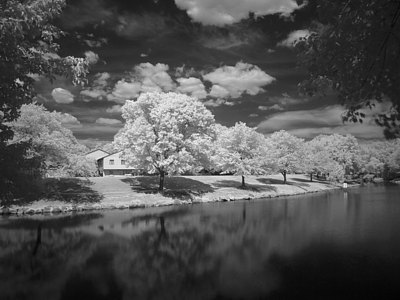 [2b] ...and the final tonal adjustment. (See the XGA version.) |
|
This looks good. One of the first things I've noticed is that noise is significantly lower in my IR images from the E-510 than in those from any other camera I've used. Now, some practical advice, assuming you are using the R72 IR filter, available from Hoya (#89B in the Wratten notation). It provides enough of infrared effect, at the same time requiring less exposure than the stronger #87. Camera sensitivity in infrared: about average for the current vintage. This IR frame needed an exposure exactly 1000 times longer than the visible-light one, which is a difference of 10 EV. This is typical, although it may vary by 1 EV or so, depending on the subject and light. The exposure automation works just fine in infrared, as long as you set a +5 EV of compensation, which was the case here. Start from this and adjust as needed. | |
 Luminance histogram of [2] | Just remember that the image has to look underexposed: almost all signal is in the red channel which will overload easily if you make the overall luminance histogram to use the whole range; it should rather stay within the bottom half, as shown here. If in doubt, check the histogram of the red channel after taking a picture. |
|
Live View: very useful, but only if you activate the Live View Boost option from the menu, otherwise the image is very dark. You have to be warned, however, that both the exposure readout in the Live View mode and the histogram displayed do not have anything to do with the exposure which will be set by the camera's actual AE system. I'm not at all surprised. In Live View, the exposure information is generated by the image sensor, and this information is entirely independent from that produced by the AE receptors (which look at the focusing screen, not available in that mode). While the designers adjusted the display so that both sources agree, they did it for visible light only; the camera is not really intended to be used in infrared. To complicate things further: the histogram displayed in Live View with boost enabled does not show the luminance distribution of the image which will be generated. That happens also in visible light, a separate problem. Regardless of the underlying reasons: just ignore the readout on the preview screen, or, better, remove it by pressing the [Info] button as many times as it takes. The Live View (in infrared, that is) becomes more readable if you switch the Picture Mode to monochrome (see below). Autofocus: do that through the filter; do not pre-focus in visible light, as the focus point in infrared is shifted. The AF system should work if you point it at some detail it can use for the purpose. You will be near the bottom of the camera's AF range (in terms of EV), but still within it. The point you want to focus on usually will be not in the center of the frame (where the most sensitive AF sensor is), therefore it makes sense to switch to the Manual Focus mode and use AF "on demand": point the camera at a "focusable" detail, activate autofocus, then recompose and shoot. (To do that, assign the [Fn] button in MF mode to autofocusing, as described here). Sensor gain: try to stay between ISO 100 and 400; images in infrared tend to be noisier than in visible light. This is due to longer exposures, as well to the fact that only red photosites participate in the image, so that effectively you are using a 2.5 MP camera. At these settings I prefer to have the noise filtering at Off or at most Low, but you are free to experiment. Higher ISOs are noisier and less sharp. Some people will still want to use them, as the extra noise emulates the grain effect, a part of the classic "IR look". At ISO 1600, however, I often see some banding (regular patterns ) in the shadows, so I would rather avoid this setting. Image stabilization: While I have yet to try this feature in infrared photography, it sounds very tempting. My informal tests of IS (in visible light) resulted in more than 50% of sharp (not blurred) frames at 1/15 s and a focal length of 150 mm. A common-sense estimate is that at 14 mm I could expect this result at exposures 10× as long: 0.6 s. This is exactly what's needed for sunny scenes at F/3.5, therefore handheld infrared becomes a borderline possibility with this camera. Moving up to ISO 400 could make it even more real. I hope to try this out at the first opportunity, and then I'll update this section. Postprocessing: my usual infrared practice is first to desaturate the color (actually: monochrome with red tint) image, then stretch the luminance histogram to get the desired effect. Only then you may think about moving the mid-tones a bit, usually down, or adjusting the contrast. Some people like to play with color layers to get some "false color" effect. That's fine, but I prefer my IR pictures in monochrome. Ghosting and hot spots: none noticed with the included kit lenses: 14-42 mm F/3.5-5.6 and 40-150 mm F/4-5.6 ED ZD. This effect, revealing itself most often as a brighter, more or less diffused circle in the center of the frame, is seen with some digital SLRs, especially with certain lenses. It is probably due to the lens interior not being sufficiently "black" for infrared light. (I've seen also a non-circular version, probably due to some other reasons.) The problem seems to have been most widespread in Canon digital SLRs. In-camera monochrome. This is a technique I tried first only with the E-510. Setting the Picture Mode to Monotone [sic!] with the red filter applied in that mode setting seems to produce quite nice results. Have a look. | |
 [3] |
 [3a] Image [3] after tonal adjustment. The XGA version can be seen here. | |
|
I suspect there is something in the raw-to-RGB conversion of such a picture, that the available brightness range is better utilized, but I'm not sure. Anyway, the final result is quite similar, but the Live View display is more readable in monochrome so that framing on the monitor is easier. This may be enough of a reason to prefer this approach. | ||
|
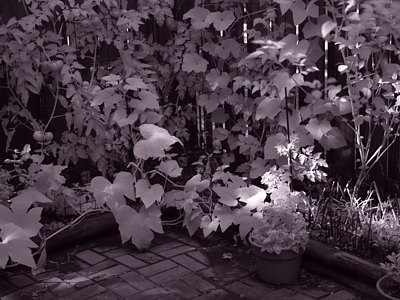
The monochrome mode in the E-510 allows images to be tinted with a hue of a color you can select. While this can be done in postprocessing, the built-in effect is quite subtle and pleasing, and may be worth trying. Here is an example, just the final result, after some equalization and contrast enhancement. You may also want to have a look at the XGA version
E-510, R72 filter, 14-42 mm F/3.5-5.6 ED ZD at 35 mm; aperture priority (+5 EV): 2.5 s at F/5.3, monochrome mode, red filtration, purple (?) tint. |
| |
|
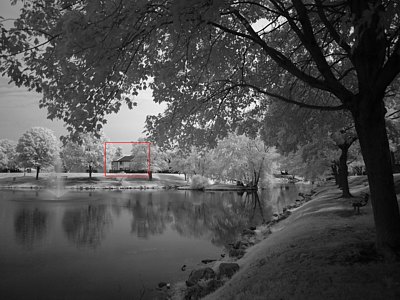
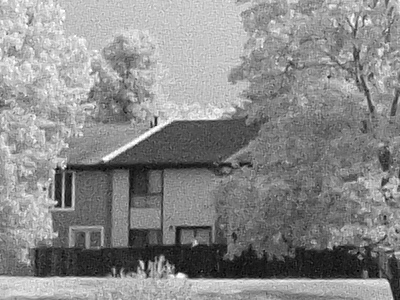
Handheld infrared? If you have a digital camera custom-modified by replacing the anti-IR filter with plain glass, this is, of course, possible — but I'm talking about an off-the-shelf camera, just a plain E-510. Actually, why not? Sample [2] above was shot at F/3.5, using a shutter speed of 0.625 s. That's about 20 times longer than the "generally accepted" (whatever that means) handheld speed of 1/30 s at the focal length of 14 mm. My statistical check of image stabilization has shown that this is approximately what I gain from image stabilization, with a 50% chance of getting blur-free pictures. (True, that test was done for a focal length of 150 mm, so I'm just assuming that it will be the same here.) Additionally, we can gain a factor of four using ISO 400 instead of 100. This means that it may be worth a try! A day after mentioning this idea in the original version of this article, I checked it out. The day was not as bright as I would like it to be, so I had to use ISO 400, with a full-aperture exposure of 0.4 s. With that, and IS enabled, about 50% of frames were OK (using the Live View, clearly a must for framing, does not help in holding the camera steady). Here is an example. | ||
|
| |
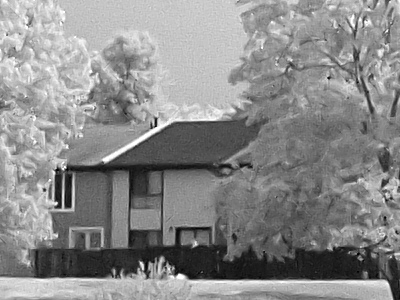
| 14-42 mm F/3.5-5.6 ZD ED at 14 mm, Hoya R72, aperture priority (+5 EV): 0.4 s at F/3.5, ISO 400, monochrome mode, noise filter off. The full frame, re-equalized and reduced in size is shown at the left; a 1:1 pixel crop at the right. (Here is the XGA version) | ||
|
Indeed, no signs of camera shake; not bad for a half-second, handheld exposure.
I didn't go for ISO 800, as then the noise begins to be objectionable — more than in visible-light pictures. At ISO 400 the noise pattern is tight and neat, except for darker areas in the water. As the in-camera noise filtering was turned off, I also processed the final image with the Neat Image plugin. The results are shown at the right. Well, this removed the noise, but also some detail in the trees. I prefer the original version, although this one has some special feel to it. |
| |
|
Anyway, the combination of Live View and image stabilization actually makes handheld infrared shooting possible with the E-510 — if barely so. But try it with any other camera... The bottom line: the E-510, while showing an average (for a digital SLR) or even low (in absolute terms) sensitivity to infrared, can be quite useful in IR applications because of the live, electronic image preview. The low IR sensitivity is partially offset by low noise levels, certainly up to ISO 400, and generally pleasing nature of produced images. No ghosting or fogging is definitely a plus. All limitations aside, this camera turns out to be the best infrared performer among digital SLRs I have seen so far (August, 2007), unless you spend an extra $300-$500 for a filter surgery on one of your bodies. With this, I may be doing more infrared than ever this year. | ||

|

|
Back to the Olympus E-System...
...or to Infrared Photography |
| Home: wrotniak.net | Search this site | Change font size |
| Posted 2007/08/08; last updated 2008/02/01 | Copyright © 2007-2008 by J. Andrzej Wrotniak |